How to Look at Pond Water With a Microscope

How to Look at Pond Water With a Microscope

After the microscope slide series, I wanted real specimens from nature like pond water, which is what I’m doing today, and I have a pond in my backyard. I did this several times, it will be easy, so let’s get started.

Things you’ll need: Pond water, a jar, forceps eye dropper, microscope slides, cover slips, paper, and a microscope with 40x-100x magnification.20170726_163820

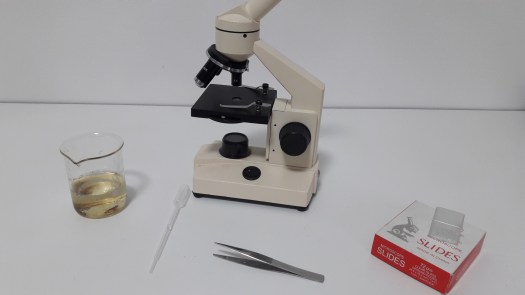
  1. Collect the water using the jar. I found 2 tadpoles and 1 mosquito larva in my collected water.20170726_163959
  2. Use the eye dropper to collect a small amount of the water from the jar.
  3. Place the microscope slide that you’re using on to a piece of paper
  4. Release one drop of the water onto the microscope slide from the eye dropper. 20170726_164218
  5. Use forceps to carry the cover slip, then use it to cover the slide.  This will spread the water out into a thin layer over the slide.
  6. Place the prepared slide into the microscope. Then, activate the microscope’s light.

I looked at the water under the microscope but I don’t see anything interesting. The only thing I see: dirt, string, and dots.

So I’m not going to look at the water. I wanted to see the organisms I collected.

I sucked the mosquito larva into the eyedropper.

Mosquito Larva:

20170726_164713

I dropped the mosquito larva onto the slide. But I’m not going to put the cover slip on.20170726_164747

Yay! I can see it!

20170726_165527
Tail (40x)
20170726_165552
40x

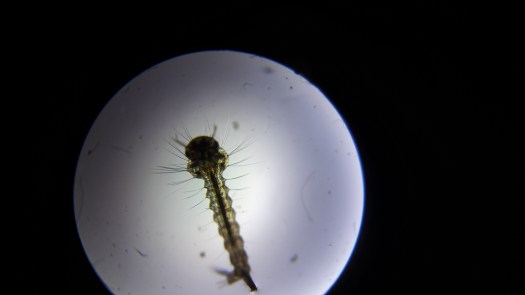
Look at it! Compare it to the one from the previous posts:

I wonder what will happen if I put the cover slip on.

And it appears that I crushed it…20170726_165643

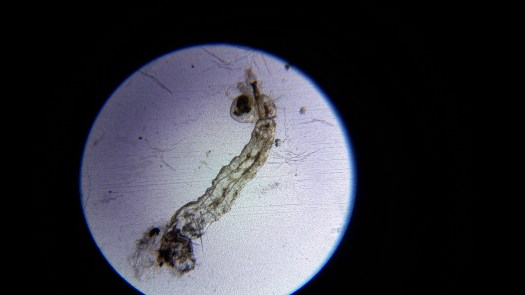
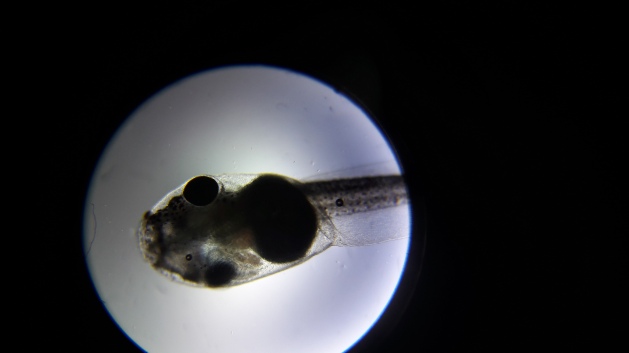
Let’s look at the tadpole:

Tadpole:20170726_165748

20170726_165820
40x
20170726_165857
Tail (40x)


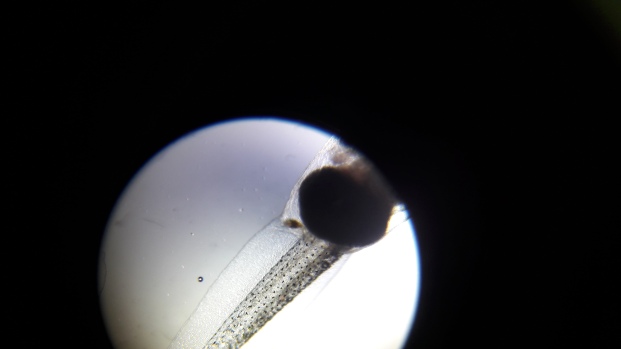
I put the cover slip on, and the tadpole crushed.

I released the left over tadpole back into the pond :D.

Do you like microscopes? Tell me in the comment section↓

The Agar Test and Bacteria Culture

The Agar Test

I completely forgot about this exciting experiment. I did this experiment 2 years ago, but I don’t know what to call it. I will call it… The bacteria experiment. This experiment is to let you culture (grow) bacteria. But I’m not going to do that experiment today. I wanted to check my agar.

Agar is a jelly-like substance, obtained from algae. Agar is derived from the polysaccharide agarose, which forms the supporting structure in the cell walls of certain species of algae, and which is released on boiling.

Simply, agar is the bacterias’ food. Let’s look at it.20170707_190853

I used half of it. I store it in my refrigerator and hid it deep in there so nobody can see it. If my mom sees that, it will be in the garbage bin because she doesn’t like chemicals to be with food. Anyway, I’m going to check it to make sure that it works properly. Wait, what’s this?20170707_190901

Expires on September 10th 2015?

This would not work. But I hid it so well though 😂.

And store it at 2-8°C (36-46°F)? My ‘fridge is only 10°C.

This can’t work. But you know, it may work.

It’s still frozen, so I’m going to boil the whole bottle if I remember 2 years ago. I need to clean everything, even the container that it’s going to be boiled in. I don’t want it to be contaminated.

To do the test you’ll need:

Things you’ll need: 2 petri dishes, beaker, alcohol lamp, agar, gloves, towels, and Q-tips.

Warning: Make sure everything is clean.

  1. Boil the whole bottle of agar in the beaker. The agar will turn into liquid.20170708_092615
  2. Pour the agar into the petri dishes; half way.20170708_102827
  3. Use a Q-tip to collect bacteria. Rub it on dirty things (I used a shoe).
  4. Rub the Q-tip that is dirty on to one petri dish. Leave the other one alone.20170708_103632
  5. Place it in a dark place, cover it with half way a petri dish lid, and wait for 2-3 days.

If the dirty petri dish has dots on it and the other one doesn’t, your agar is fine.

If the dirty petri dish has nothing on it, the agar is bad.

But it looks like that it’s fine.20170709_182657.jpg

The clean one is one the left and the dirty is on the right.20170709_182703.jpg

The result is: my agar is fine.


Separating Salt out of Water

Separating Salt out of Water

Salt (NaCl) is a natural mineral made up of white cube-shaped crystals composed of two elements, sodium, and chlorine. It is translucent, colorless, odorless (officially, though we think you can smell the freshness of the sea in one of our boxes) and has a distinctive and characteristic taste. Salt occurs naturally in many parts of the world in mineral form and has been mined for thousands of years. Chemically, sea salt is the same.

Gastronomically, it’s very different. I’m going to show you how salt can be separated out of water.

Things you’ll need: a beaker, water, salt (ocean water would be better), and an alcohol lamp.20170627_143414

  1. Mix 50 ml water with 19 grams of salt together, stir the solution until dissolve.
  2. Light the alcohol lamp and place the beaker on the stand.20170627_143509
  3. Wait until the water is all gone (don’t let the salt be in there for too long, or it will burn)

Here’s my salt. It’s fluffy and soft like snow when I touched it.20170627_191307

I wish I could weigh it and see the difference from where I started.

Salt evaporation ponds, also called salterns, salt works or salt pans, are shallow artificial ponds designed to extract salts from sea water or other brines. The seawater or brine is fed into large ponds and water is drawn out through natural evaporation which allows the salt to be subsequently harvested. The ponds also provide a productive resting and feeding ground for many species of waterbirds, which may include endangered species. The ponds are commonly separated by levees.

Natural salt pans are geological formations that are also created by water evaporating and leaving behind salts. Some salt evaporation ponds are only slightly modified from their natural version, such as the ponds on Great Inagua in the Bahamas, or the ponds in Jasiira, a few kilometres south of Mogadishu, where seawater is trapped and left to evaporate in the sun.

Source: https://en.wikipedia.org/wiki/Salt_evaporation_pond