Remember that experiment about mercury? I tried to show you that mercury can conduct electricity. And it did. I studied it a little bit more and I found this:
A Simple (Tilt) Mercury Switch:
It’s similar to the one we did the last time. Instead of tilting it around, what if you suck the mercury in and out. Isn’t that better? I’ll try to build one just for fun.
I made a hole in a little container (what don’t know what to call it) and put a syringe in there. Then, I poked holes in the bottom and glued 2 wires in, and poured the mercury in.
I realized that time passes so fast, it was about a week since I made a new post. I feel like it has been for only 3 days. Anyways, let’s get started with the post.
I’ll try to make Naphthalene crystals. Naphthalene is a white crystalline solid with a characteristic odor. It’s melting point is about 80°C. If you leave it to expose air, it’ll change into a gas.
My Naphthalene:
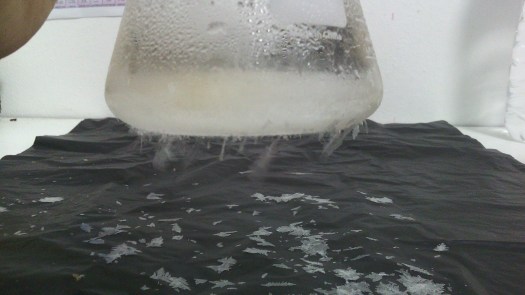
I put about 7 balls of Naphthalene into a 600 ml beaker, and I put a flask with cold water on top of it.
The Naphthalene is vaporizing quickly. The vapors will get in contact with the cold water in the flask and turn back into a solid.
Crystals are also forming in the beaker, because it’s touching the cold air outside, just like what’s happening in the flask.
All of the Naphthalene has changed into liquid, it was boiling a little too fast so I stopped the heat.
The crystals are so fragile so I used a trash bag to make the crystals fall onto it.
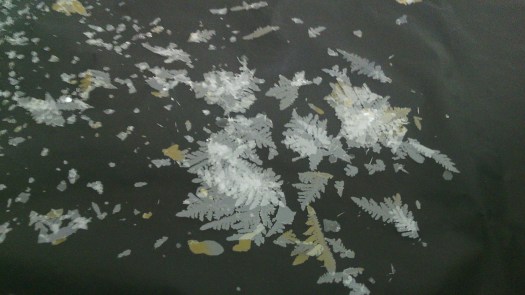
Here are the crystals. They look like fern leaves and snowflakes! But I wish the crystals were chunks, not thin like this. I looked in the internet for pictures of Naphthalene crystals, and they’re just like mine. The reason that it’s yellow is because the light is just reflecting it.
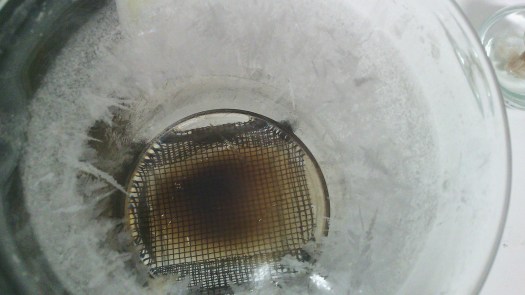
Here’s the beaker:
I hoped you enjoyed the post, if you did, drop a like down below ↓
Turning a Coin to Silver and Gold (Simple Redox Reaction)
This simple experiment will make you understand the redox reaction. This is one of my favorite experiments so I decided to make a post about it.
Things you’ll need: a copper coin (a penny, basically), zinc powder, sodium hydroxide (more than 50%), alcohol lamp, forceps, and a beaker.
Pour Sodium Hydroxide into a beaker and pour some zinc dust in it, enough to cover the coin.
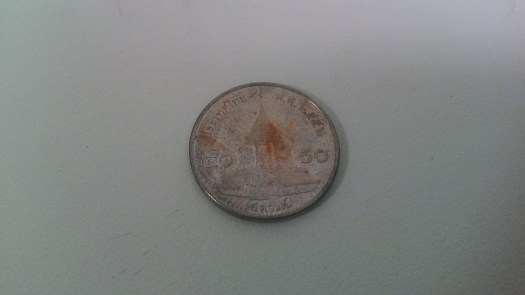
Put the coin the beaker and wait for a couple hours, I’ll be using my country’s copper coin.
Take the coin out with forceps and wash it with water, now you have a silver coin.
If you want to continue, do the following steps: Make sure the coin is dry. Heat it up with an alcohol lamp until it’s yellow.
Enjoy.
An oxidation-reduction (redox) reaction is a type of chemical reaction that involves a transfer of electrons between two chemicals. A redox reaction is any chemical reaction in which the oxidation number of a molecule, ion, or atom changes by losing or gaining an electron. For example, like this experiment, the zinc transferred its ions to the copper; that’s how the coin turned silver, and that’s why this is a redox reaction. What about turning it to gold? The color of silver and copper are just mixing together when heated and that makes the gold color.
After that long break, I would like to do a very simple experiment to start. This one is pretty common, most people probably know this experiment, but no one realized that there was more to it.
Things you’ll need: Yeast, hydrogen peroxide, a beaker, and a thermometer.
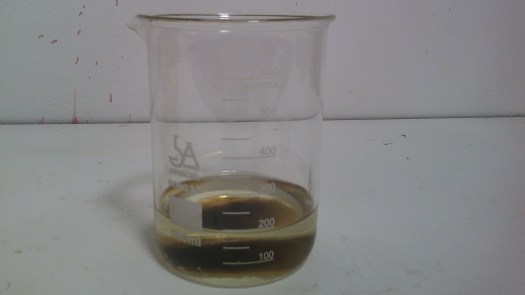
Pour 200 ml of hydrogen peroxide into a beaker.
Insert the thermometer and look at the temperature.
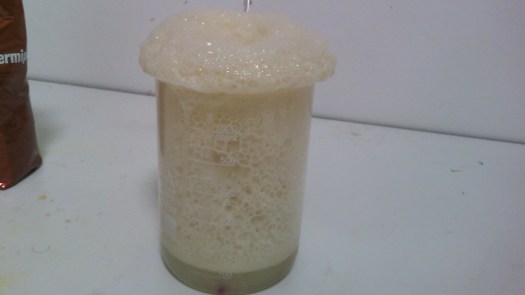
Add some yeast, not too little, stir it into the hydrogen peroxide.
Keep waiting, the temperature will be high.
My temperature is about 63°C. That’s very hot. You saw the temperature change. The energy in the chemicals was converted to heat energy by the chemical change. You must know the yeast + H2O2 reaction, so I’m not going to explain it. This is also another way to create the elephant’s toothpaste demonstration.
Thanks for taking your time to look at this post 🙂
The last time we used test tubes and destroyed all of them! So I’m going to use a beaker.
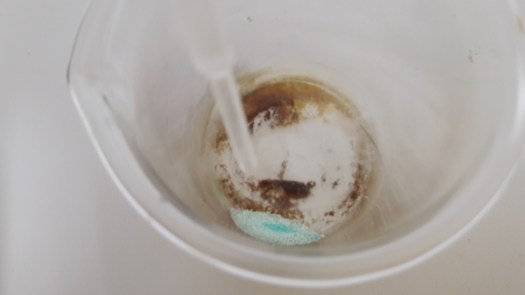
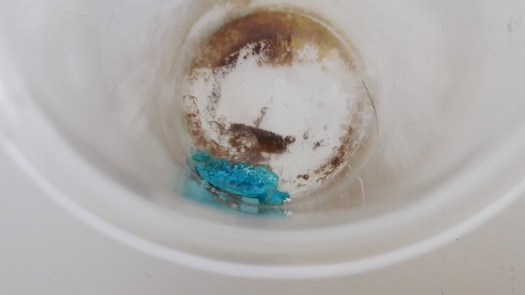
I put the copper sulfate in it and going to burn it.
It’s white now. I’ll drop water on it.
It worked!
I’m guessing that it works like this: I took the water molucles out by evaporating the water, now I have this white dust without water in there, and when I added the water, it turned back to blue (it’s like adding the water molucles back to it). This is why I love chemistry. It’s so awesome!
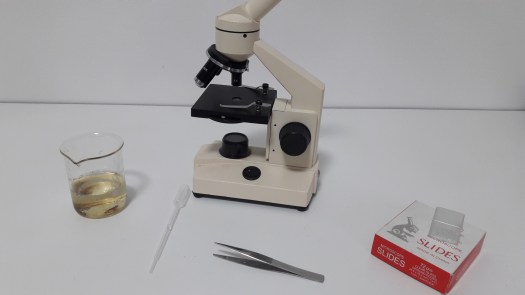
After the microscope slide series, I wanted real specimens from nature like pond water, which is what I’m doing today, and I have a pond in my backyard. I did this several times, it will be easy, so let’s get started.
Things you’ll need: Pond water, a jar, forceps eye dropper, microscope slides, cover slips, paper, and a microscope with 40x-100x magnification.
Collect the water using the jar. I found 2 tadpoles and 1 mosquito larva in my collected water.
Use the eye dropper to collect a small amount of the water from the jar.
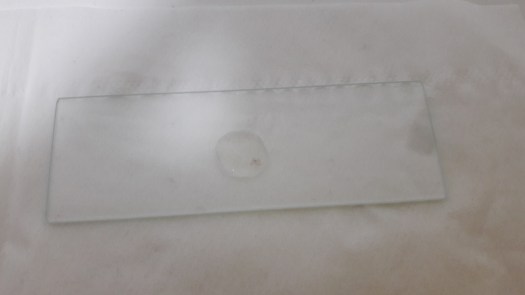
Place the microscope slide that you’re using on to a piece of paper
Release one drop of the water onto the microscope slide from the eye dropper.
Use forceps to carry the cover slip, then use it to cover the slide. This will spread the water out into a thin layer over the slide.
Place the prepared slide into the microscope. Then, activate the microscope’s light.
I looked at the water under the microscope but I don’t see anything interesting. The only thing I see: dirt, string, and dots.
So I’m not going to look at the water. I wanted to see the organisms I collected.
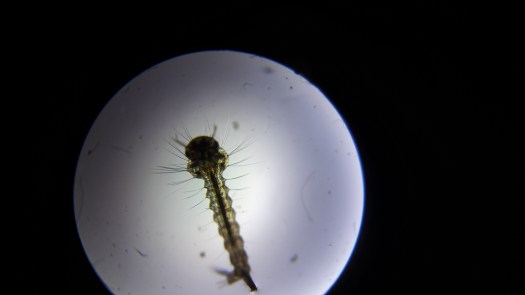
I sucked the mosquito larva into the eyedropper.
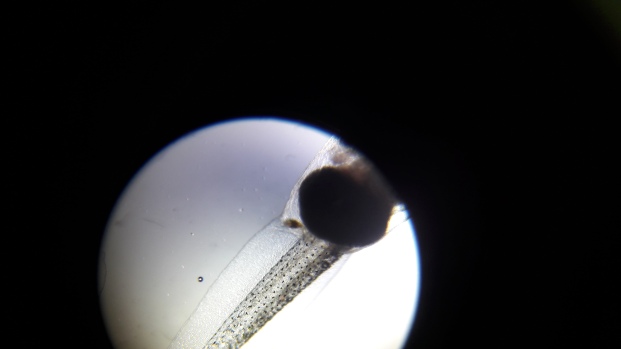
Mosquito Larva:
I dropped the mosquito larva onto the slide. But I’m not going to put the cover slip on.
Yay! I can see it!
Tail (40x)40x
Look at it! Compare it to the one from the previous posts:
Tail (from the pond)
I wonder what will happen if I put the cover slip on.
And it appears that I crushed it…
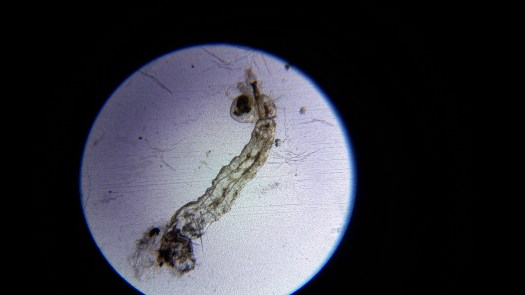
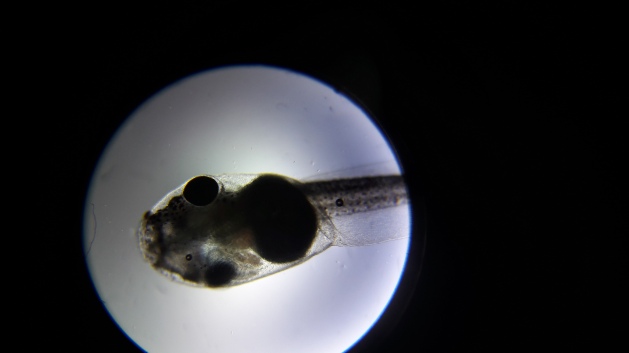
Let’s look at the tadpole:
Tadpole:
40xTail (40x)
I put the cover slip on, and the tadpole crushed.
I released the left over tadpole back into the pond :D.
Do you like microscopes? Tell me in the comment section↓