Mercury Compared to Water

Mercury Compared to Water

IMG20180704170204.jpg

This is going to be a short post because I’ll be comparing Mercury to Water. I’ll be trying to find out why mercury is 14 times denser than water:

I poured all of my mercury into a petri dish and I have 22.70 grams of it. So I added the same weight of water into a petri dish and weighed it.

And after that, I pour the mercury and water into beakers to measure them.

There are 1.6 ml of mercury and 22 ml of water. That explains why mercury is 14 times denser than water (22 ÷ 1.6 = 13.75 ≈ 14).

Here are some more comparisons:

 Mercury  Water
Color  Metalic Silver  Clear/Transparent
Density  13.534 g/cm3  1 g/cm3
Conductivity  High  Medium
Toxicity  High  None


Melting #4: Testing the Liquid

Melting #4: Testing the Liquid

In the last time: I extracted water from Copper (II) Sulfate, and I would like to test it. What I would like to know is: can we drink it. Let’s find out.

20170820_151048
The liquid

I didn’t use a rubber stopper to close the test tube because the new test tubes didn’t fit it. At least, I can close it with a tissue.


The first thing that I always do when I test liquids is to check the PH.

A better tool for this task is a PH meter, but I don’t have one. So I have to use the old-fashioned litmus paper.

20170823_122948

The left piece of paper is the liquid that we’re testing now and the right is drinking water from bottles (not tap water). And on the top is a chart of what the litmus paper is indicating. Looks like the liquid is acidic and the drinking water is about in the middle.

It smelled like plastic when I smelled the liquid, I’m guessing it’s because the rubber tube that I used is heated and the plastic smell comes out.

After that, I thought about PH indicators. I used Phenolphthalein, Bromothymol blue, and Methyl orange. Phenolphthalein is colorless from 0 PH to 8.3 PH, Bromothymol blue will be yellow from 1 to 6 PH, and Methyl orange is red from 1 to 3.1 PH.

20170820_151929

Well, I guess you can’t drink it. I thought that I could manufacture water from it.

Thought it will work but I guess the only place you could obtain water is from nature 🙂

Melting #3: Liquid from Copper (II) Sulfate

Melting #3: Liquid from Copper (II) Sulfate

Well, the last time, we tried to melt copper (II) sulfate, and it didn’t work at all. But there’s this water vapor from it:20170808_164631

What I wanted to do today, is to extract the water out of it and test it. It loses two water molecules when heating at 63 °C (145 °F), two more at 109 °C (228 °F), and the final water molecule at 200 °C (392 °F). What are we waiting for? Let’s get started!

20170817_164251

OK, I’ve setup this apparatus to extract the liquid. On the top left is the copper sulfate in a test tube. I’m going to heat it up and water vapor will go into the plastic tube and go into the test tube.

20170817_164321

Turned on the heat and we just need to wait.

20170817_165002

Yay! it’s working!

20170817_165055

There is so much water coming in!

20170817_165343

I turned off the heat because most of the water is extracted, I’m going to put some more in there.

20170817_165352

20170817_170346

I added a new load of copper sulfate to get more liquid, but… the test tube….

20170817_170352

I added some cold water in the beaker on the test tube that’s receiving the liquid because I think that using a cold temperature will turn the water vapor into drops of water before the water vapor escapes from the test tube.Water vapor turns into liquid droplets when cooled. That is called condensation, it’s the opposite of evaporation. Let’s see if this works.

20170817_171555

All right, finished. I think the second method works better. And the best thing is: we got some liquid! I’m going to make a separate post about testing this liquid.

But… the test tube… It’s gone…

20170817_191244

R.I.P

It’s sad to see death…

Good bye.. Last test tube…

Don’t worry, I’ll buy new ones 😃

The Silver Coin

The Silver Coin

What about this experiment? Remember the silver tree? That was a great experiment. Go over there and check it out (here: https://danupondrake.wordpress.com/2017/06/25/the-silver-tree/). The silver nitrate will stick to the copper coil and make crystals. But instead of copper coils, why don’t we try copper coins? It will be fun to try! Let’s get started then!

Let’s some coins from different countries.

Penny (19 mm diameter): The alloy remained 95 percent copper and 5 percent zinc until 1982, when the composition was changed to 97.5 percent zinc and 2.5 percent copper (copper-plated zinc) until now. Cents of both compositions appeared in that year.20170731_141057.jpg

50 Satang (Thai baht) (18 mm diameter): The core is 99% iron and cladding is 99% Copper.20170731_141106

10 Yen (Japanese Yen) (23.5 mm diameter): 95% copper, 3–4% zinc, and 1–2% tin.20170731_141232.jpg

To hang the coins in the beaker, I used paper clips to hold the coins…

…And tie rubber bands at each paper clips.20170731_143925 - Copy

I made the solution for the experiment and dipped the coins in there…

Now I just have to wait.

20170731_145314


30 Minutes later:


20170731_152348

The coins are just turning blacker. So I took the coins out and cleaned them.20170731_15315320170731_153124

The coins look different. The penny turn yellow-orange, the Satang turned darker, and the Yen turned yellow.

But I wonder why…

Maybe bec

Hope you enjoyed this post, if you did, tell me in the comment section ↓

Sources:

www.livescience.com/32401-whats-a-penny-made-of.html

https://en.wikipedia.org/wiki/Fifty-satang_coin

https://en.wikipedia.org/wiki/Japanese_yen

How to Look at Pond Water With a Microscope

How to Look at Pond Water With a Microscope

After the microscope slide series, I wanted real specimens from nature like pond water, which is what I’m doing today, and I have a pond in my backyard. I did this several times, it will be easy, so let’s get started.

Things you’ll need: Pond water, a jar, forceps eye dropper, microscope slides, cover slips, paper, and a microscope with 40x-100x magnification.20170726_163820

  1. Collect the water using the jar. I found 2 tadpoles and 1 mosquito larva in my collected water.20170726_163959
  2. Use the eye dropper to collect a small amount of the water from the jar.
  3. Place the microscope slide that you’re using on to a piece of paper
  4. Release one drop of the water onto the microscope slide from the eye dropper. 20170726_164218
  5. Use forceps to carry the cover slip, then use it to cover the slide.  This will spread the water out into a thin layer over the slide.
  6. Place the prepared slide into the microscope. Then, activate the microscope’s light.

I looked at the water under the microscope but I don’t see anything interesting. The only thing I see: dirt, string, and dots.

So I’m not going to look at the water. I wanted to see the organisms I collected.

I sucked the mosquito larva into the eyedropper.

Mosquito Larva:

20170726_164713

I dropped the mosquito larva onto the slide. But I’m not going to put the cover slip on.20170726_164747

Yay! I can see it!

20170726_165527
Tail (40x)
20170726_165552
40x

Look at it! Compare it to the one from the previous posts:

I wonder what will happen if I put the cover slip on.

And it appears that I crushed it…20170726_165643

Let’s look at the tadpole:

Tadpole:20170726_165748

20170726_165820
40x
20170726_165857
Tail (40x)


I put the cover slip on, and the tadpole crushed.

I released the left over tadpole back into the pond :D.

Do you like microscopes? Tell me in the comment section↓

The Agar Test and Bacteria Culture

The Agar Test

I completely forgot about this exciting experiment. I did this experiment 2 years ago, but I don’t know what to call it. I will call it… The bacteria experiment. This experiment is to let you culture (grow) bacteria. But I’m not going to do that experiment today. I wanted to check my agar.

Agar is a jelly-like substance, obtained from algae. Agar is derived from the polysaccharide agarose, which forms the supporting structure in the cell walls of certain species of algae, and which is released on boiling.

Simply, agar is the bacterias’ food. Let’s look at it.20170707_190853

I used half of it. I store it in my refrigerator and hid it deep in there so nobody can see it. If my mom sees that, it will be in the garbage bin because she doesn’t like chemicals to be with food. Anyway, I’m going to check it to make sure that it works properly. Wait, what’s this?20170707_190901

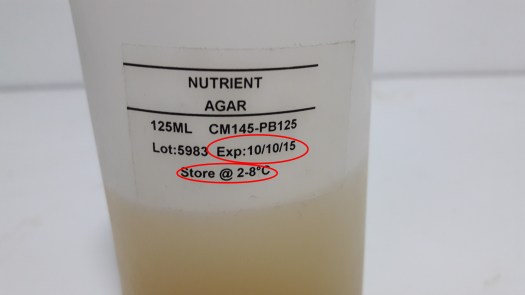
Expires on September 10th 2015?

This would not work. But I hid it so well though 😂.

And store it at 2-8°C (36-46°F)? My ‘fridge is only 10°C.

This can’t work. But you know, it may work.

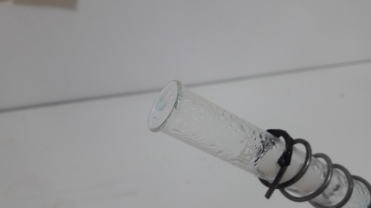
It’s still frozen, so I’m going to boil the whole bottle if I remember 2 years ago. I need to clean everything, even the container that it’s going to be boiled in. I don’t want it to be contaminated.

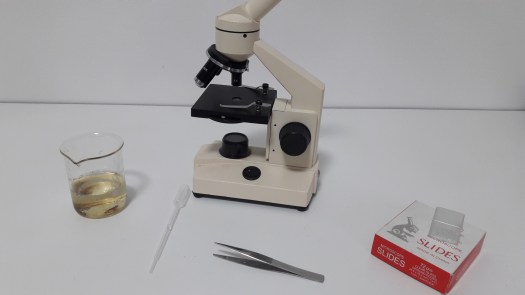
To do the test you’ll need:

Things you’ll need: 2 petri dishes, beaker, alcohol lamp, agar, gloves, towels, and Q-tips.

Warning: Make sure everything is clean.

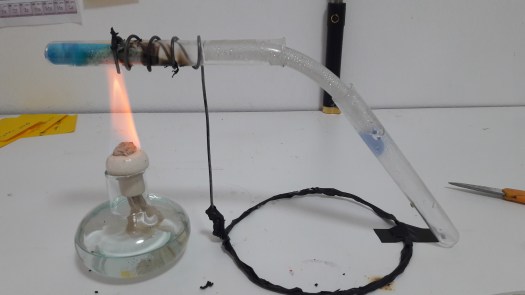
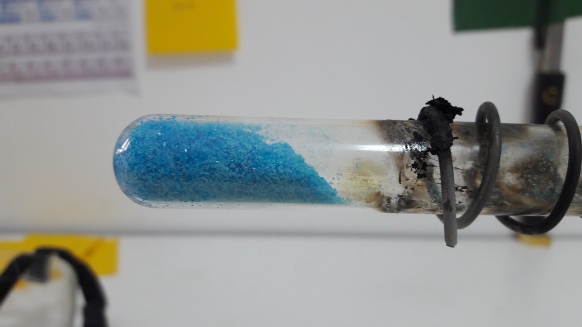
  1. Boil the whole bottle of agar in the beaker. The agar will turn into liquid.20170708_092615
  2. Pour the agar into the petri dishes; half way.20170708_102827
  3. Use a Q-tip to collect bacteria. Rub it on dirty things (I used a shoe).
  4. Rub the Q-tip that is dirty on to one petri dish. Leave the other one alone.20170708_103632
  5. Place it in a dark place, cover it with half way a petri dish lid, and wait for 2-3 days.

If the dirty petri dish has dots on it and the other one doesn’t, your agar is fine.

If the dirty petri dish has nothing on it, the agar is bad.

But it looks like that it’s fine.20170709_182657.jpg

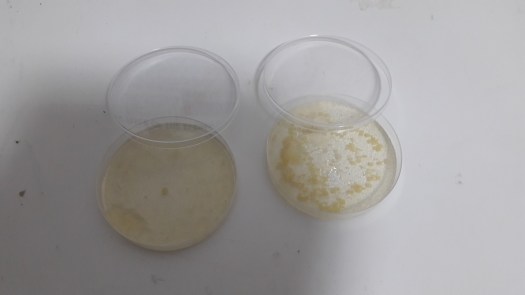
The clean one is one the left and the dirty is on the right.20170709_182703.jpg

The result is: my agar is fine.


Separating Salt out of Water

Separating Salt out of Water

Salt (NaCl) is a natural mineral made up of white cube-shaped crystals composed of two elements, sodium, and chlorine. It is translucent, colorless, odorless (officially, though we think you can smell the freshness of the sea in one of our boxes) and has a distinctive and characteristic taste. Salt occurs naturally in many parts of the world in mineral form and has been mined for thousands of years. Chemically, sea salt is the same.

Gastronomically, it’s very different. I’m going to show you how salt can be separated out of water.

Things you’ll need: a beaker, water, salt (ocean water would be better), and an alcohol lamp.20170627_143414

  1. Mix 50 ml water with 19 grams of salt together, stir the solution until dissolve.
  2. Light the alcohol lamp and place the beaker on the stand.20170627_143509
  3. Wait until the water is all gone (don’t let the salt be in there for too long, or it will burn)

Here’s my salt. It’s fluffy and soft like snow when I touched it.20170627_191307

I wish I could weigh it and see the difference from where I started.

Salt evaporation ponds, also called salterns, salt works or salt pans, are shallow artificial ponds designed to extract salts from sea water or other brines. The seawater or brine is fed into large ponds and water is drawn out through natural evaporation which allows the salt to be subsequently harvested. The ponds also provide a productive resting and feeding ground for many species of waterbirds, which may include endangered species. The ponds are commonly separated by levees.

Natural salt pans are geological formations that are also created by water evaporating and leaving behind salts. Some salt evaporation ponds are only slightly modified from their natural version, such as the ponds on Great Inagua in the Bahamas, or the ponds in Jasiira, a few kilometres south of Mogadishu, where seawater is trapped and left to evaporate in the sun.

Source: https://en.wikipedia.org/wiki/Salt_evaporation_pond

Ice is Sticky

Ice is Sticky

I have an experiment that uses only ice.

Things you’ll need: 2 ice cubes.

  1. Press the flat sides of two ice cubes together.

    20170606_180056
    You probably know what I mean. I can’t do it because I’m holding the camera.
  2. Slowly count to thirty, then let go one of the ice cubes. What happened?

When you pushed the two ice cubes together, you created pressure between the two flat sides. Pressure melted the ice, making a thin layer of water in between. When you release the pressure, the water refroze, “gluing” the ice cubes together.

20170606_180042
It glued!


A Water Pressure Experiment

Water Pressure Experiment

This experiment is good to demonstrate water pressure.

Things you’ll need: a water bottle with water, modeling clay, two straws, and scissors.

20170405_134809

  1. Use the scissors to cut one straw to be shorter than the other.
  2. Use the modeling clay to hold the straws together as shown in the picture.20170405_135023
  3. Place the straw and the modeling clay on the bottle as shown in the picture. (Warning: don’t let one of the straws touch the water and don’t let any air come out from the bottle). Seal the clay tightly and close all the holes.20170405_135207
  4. Blow the straw that didn’t touch the water and the water will come out from the other straw.

    Click on image to get bigger

Water pressure is a measure of the force that gets the water through our mains and into your pipes. It is measured in ‘bars’ – one bar is the force needed to raise water to a height of 10 meters. 0.1 bar equivalent to approximately 1.45 pa of pressure. With low-pressure water systems, you’ll want to measure your water pressure precisely to find a tap or shower that will give you optimum flow.

20170405_135450 copy The red arrows are water pressure.

%d bloggers like this: