Do Water Vapors Effect the Mass of Copper (II) Sulfate?

Do Water Vapors Effect the Mass of Copper (II) Sulfate?

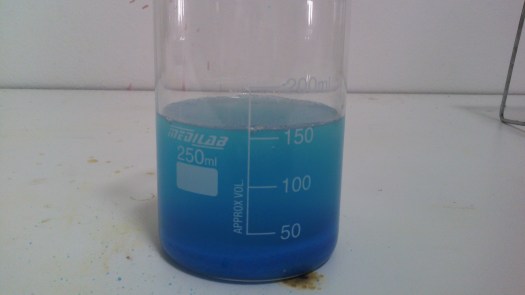
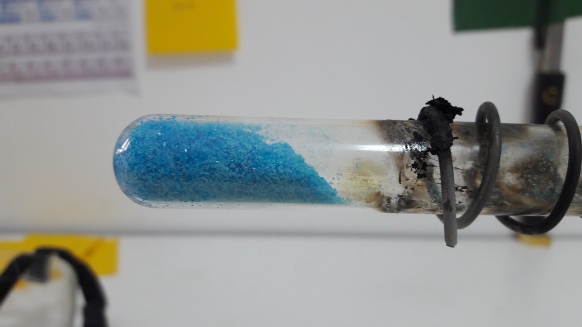
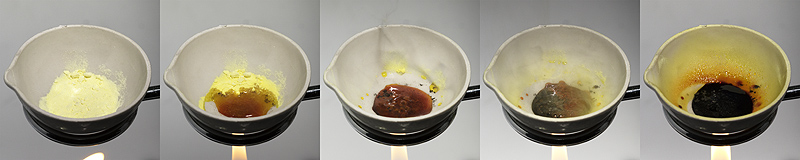
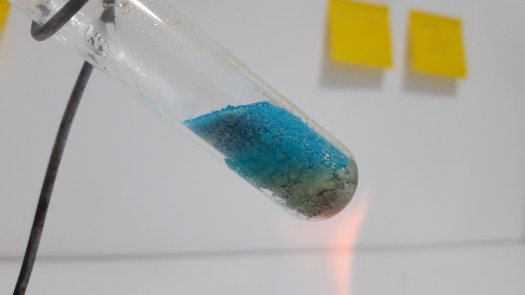
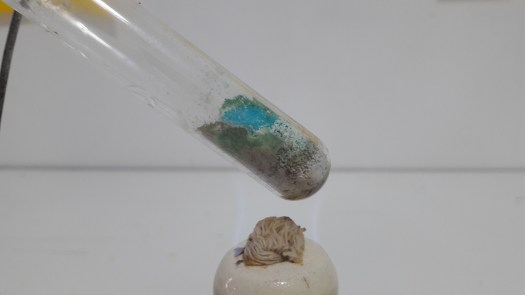
The pentahydrate form, which is blue, is heated, turning the copper sulfate into the anhydrous form which is white, while the water that was present in the pentahydrate form evaporates. I wanted to know if water vapors affect the mass of copper sulfate.

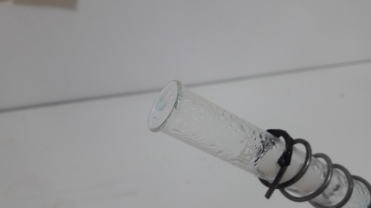
Things you’ll need: crucible, balance, Copper (II) Sulphate, spoon, alcohol lamp, and stand.

IMG_20140101_133233

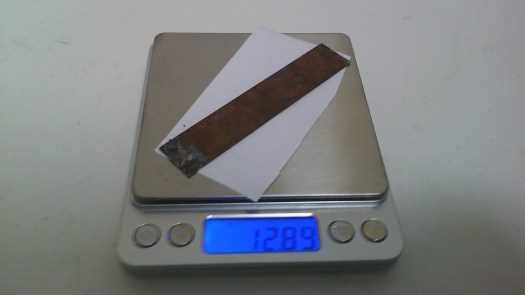
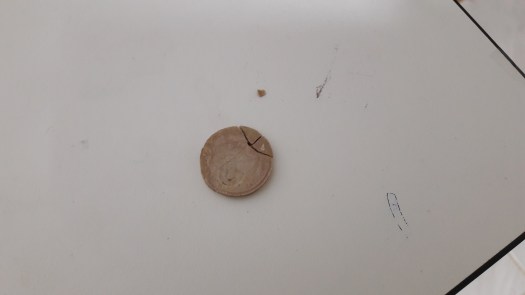
  1. Weigh the crucible and tare it. After that, put 5 grams of copper (II) sulfate into the crucible. My crucible weighs 50.41 grams as shown on the bottom.IMG_20140101_133307IMG_20140101_133513
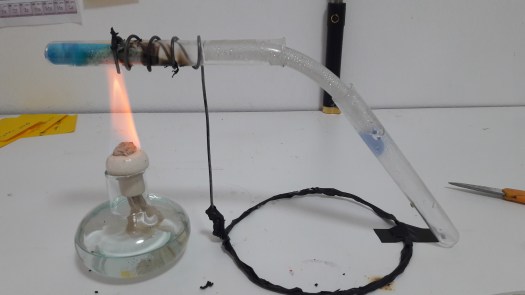
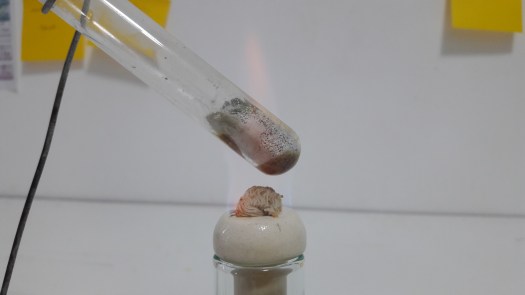
  2. Warm it up until it turns whiteIMG_20140101_134156
  3. Let everything cool off and weigh the crucible.

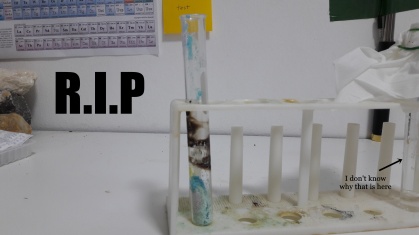
I had an error during this experiment… The balance’s batteries are out… So I had to take the copper sulfate out and reweigh the crucible. One of my epic fails…

IMG_20140101_135544

Crucible: 50.41 grams

Copper (II) Sulfate: 5.00 grams

Anhydrous Salt: 3.43 grams

Mass loss: 1.57 grams

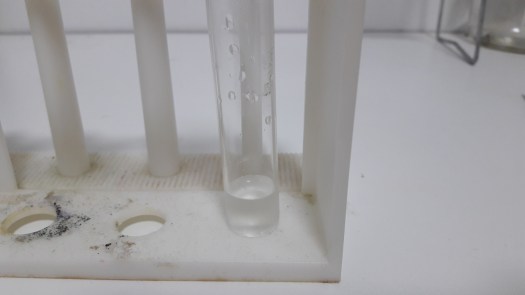
I pour in some water to get to the original mass, and it appears that I poured in about 1 and a half ml of water.

Hope you enjoyed, if you did, drop a like down below ↓

Copper Plating: Part #1

Copper Plating: Part #1

IMG_20140101_070301

I’ve never used a copper stick in one of my experiments, I found out that I’m good at plating, which is what we’re going to be doing in this post. You probably wondering why my copper is a green, it’s because of chemical reactions with the elements. Just as iron that is left unprotected in the open air will corrode and form a flaky orange-red outer layer.

IMG_20140101_070953

First, warm up some distilled water, which is what I’m doing above. Heated up until about 45°C. Don’t go too hot with the water because it’ll accelerate the plating and form crystals, which is what we don’t want.

To be honest, I’m not actually following any instructions though, so I’m not sure if this is going to work.

IMG_20140101_071209

Mix the distilled water with scoops of copper sulphate, I don’t know how much to put in there, so I put about… 100 grams I guess.

IMG_20140101_071603

What I’m going to be plating is this iron nail. I connect the nail to (-) and the copper to (+). What’s happening now is simple: the copper ions (+) is charging to the metal. Copper (which are positively charged) are attracted to the negatively charged iron electrode and slowly deposit on it—producing a thin layer of copper plate. The electrolyte just helps ions to move around.

IMG_20140101_071630

I shook the nail around because the copper will only go to one side.

IMG_20140101_071847

Now the nail is all covered in copper but…..

IMG_20140101_072143

The copper is falling off, easily…

I tried with a stick that metal and some aluminum mixed in it. But it still falls off.

The common problem is the electrolyte, as said above it accelerates the plating and makes crystals, but the water is about 35°C. Or the other problem is too much copper sulfate…

Can you tell me what the problem is? If you know, comment down below↓

Melting #4: Testing the Liquid

Melting #4: Testing the Liquid

In the last time: I extracted water from Copper (II) Sulfate, and I would like to test it. What I would like to know is: can we drink it. Let’s find out.

20170820_151048
The liquid

I didn’t use a rubber stopper to close the test tube because the new test tubes didn’t fit it. At least, I can close it with a tissue.


The first thing that I always do when I test liquids is to check the PH.

A better tool for this task is a PH meter, but I don’t have one. So I have to use the old-fashioned litmus paper.

20170823_122948

The left piece of paper is the liquid that we’re testing now and the right is drinking water from bottles (not tap water). And on the top is a chart of what the litmus paper is indicating. Looks like the liquid is acidic and the drinking water is about in the middle.

It smelled like plastic when I smelled the liquid, I’m guessing it’s because the rubber tube that I used is heated and the plastic smell comes out.

After that, I thought about PH indicators. I used Phenolphthalein, Bromothymol blue, and Methyl orange. Phenolphthalein is colorless from 0 PH to 8.3 PH, Bromothymol blue will be yellow from 1 to 6 PH, and Methyl orange is red from 1 to 3.1 PH.

20170820_151929

Well, I guess you can’t drink it. I thought that I could manufacture water from it.

Thought it will work but I guess the only place you could obtain water is from nature 🙂

Melting #3: Liquid from Copper (II) Sulfate

Melting #3: Liquid from Copper (II) Sulfate

Well, the last time, we tried to melt copper (II) sulfate, and it didn’t work at all. But there’s this water vapor from it:20170808_164631

What I wanted to do today, is to extract the water out of it and test it. It loses two water molecules when heating at 63 °C (145 °F), two more at 109 °C (228 °F), and the final water molecule at 200 °C (392 °F). What are we waiting for? Let’s get started!

20170817_164251

OK, I’ve setup this apparatus to extract the liquid. On the top left is the copper sulfate in a test tube. I’m going to heat it up and water vapor will go into the plastic tube and go into the test tube.

20170817_164321

Turned on the heat and we just need to wait.

20170817_165002

Yay! it’s working!

20170817_165055

There is so much water coming in!

20170817_165343

I turned off the heat because most of the water is extracted, I’m going to put some more in there.

20170817_165352

20170817_170346

I added a new load of copper sulfate to get more liquid, but… the test tube….

20170817_170352

I added some cold water in the beaker on the test tube that’s receiving the liquid because I think that using a cold temperature will turn the water vapor into drops of water before the water vapor escapes from the test tube.Water vapor turns into liquid droplets when cooled. That is called condensation, it’s the opposite of evaporation. Let’s see if this works.

20170817_171555

All right, finished. I think the second method works better. And the best thing is: we got some liquid! I’m going to make a separate post about testing this liquid.

But… the test tube… It’s gone…

20170817_191244

R.I.P

It’s sad to see death…

Good bye.. Last test tube…

Don’t worry, I’ll buy new ones 😃

What Happened to the Sulfur Coin? (Sulfur science and can the coin melt again?)

What Happened to the Sulfur Coin? (Sulfur science and can the coin melt again?)

The coin:

Now, what happened to that coin? It was 10 days since I made it, and I wanted to show you what happened. Here’s the coin:20170815_174126

The coin has turned white and it came apart into a couple pieces… I guess it’s useless now, but I was wondering, can I melt it again? Let’s try it.

Can we melt it again:

Yes! Look at this:

20170815_174213

It’s melting just fine. It started melting in ten seconds (very quick). I’m guessing you could melt it as many times as you want just like the other metals.

Sulfur Science:

Why does yellow sulfur turn black when heated?

The internal structure of sulfur changes under heating. From stable at room temperature crystalline form of yellow color it turns into its plastic form, which has no specific internal structure. This changes the color of the substance: initially yellow sulfur becomes red-brown, and then black.

sulfur_melting

When heated above 119oC sulfur crystals melt and form a reddish-orange liquid, also consisting of S8 molecules. At temperatures even higher the sulfur ring molecules break, forming “strings” of atoms linked with one another. Exactly the occurrence of linear molecules makes molten sulfur black. These “strings” can bond their free ends to each other, forming very long molecules. As a result, the liquid sulfur thickens due to the “clumsiness” of large molecules. They can be compared to threads: the greater their length, the easier they get tangled with each other. If the black viscous liquid is heated to 187oC, it will become maximally dense (plastic sulfur). At temperatures higher yet still, the bonds in long molecules are destroyed once again, and the mass becomes thinner. Maximally runny black sulfur becomes at 400oC, and boils at 445oC.

Why does the coin change its color over time?

A substance always aims to take its most stable form. Black plastic sulfur is not stable under normal conditions. Therefore, it gradually changes its internal structure, crystallizes and turns into yellow rhombic sulfur.

The black figurine is made of very long molecules of sulfur Sn. Such an internal structure of the substance is stable only at high temperature. It can be temporarily stabilized only by quick cooling. At room temperature, long molecules gradually “break”, and their fragments form ring molecules S8. The latter form crystals of rhombic sulfur, which is the only allotropic modification of sulfur, stable at room temperature. In addition to color change, changes in other physical properties also occur. The figurine becomes fragile and eventually shatters. This process cannot be prevented, but it is very interesting to watch.

The coin turned yellow and crumbled in a couple days

Well, nothing is actually wrong here. Sulfur crystallization is a complicated process. The time it takes is mostly determined by the temperatures the substance was subjected to initially.

Source:

https://melscience.com/en/experiments/sulfur-melt/


Melting #2: Copper (II) Sulfate (Didn’t Work)

Melting #2: Copper (II) Sulfate (Didn’t Work)

The last time we melted sulfur, and it was really fun (except for cleaning the test tube). Now let’s melt something else, what about Copper Sulfate?

Copper (II) sulfate is the inorganic compound with the chemical formula CuSO4. Older names for this compound include blue vitriol, bluestone, vitriol of copper, and Roman vitriol. The pentahydrate (CuSO4·5H2O), the most commonly encountered salt, is bright blue.

Melting Point: 110 °C (230 °F)

Sulfur’s melting point is 5 °C higher (which means they’ll melt about the same time).

It looks impossible to melt it because the sulfur is more (soft) like a powder, but this one is tiny crystals. Let’s give it a try anyway.

20170808_164455

Light the lamp!

20170808_164526

OK, it’s heating it up nicely.

A couple minutes later:

20170808_164546

The copper sulfate is turning whiter, but still, all of it still remains solid.

But look. There’s water vapor in there. That’s weird, maybe there’s too much heat? But the sulfate didn’t melt yet.

10 minutes later:

20170808_164848

The sulfur melted already at this time. But the sulfate still remains a solid and it’s just turning whiter.

20 minutes later:

20170808_165401

This is taking forever! It’s not melting. Did I do something wrong?

20170808_165118

It’s 115 °C already, and the temperature can go further.

I guess it won’t melt anymore so I turned off the heat.

Wow! this experiment is a fail. I wonder why it has water vapors? Why is it turning white? When is it actually going to turn to liquid?

Any ideas why it didn’t melt? Feel free to comment down below ↓

Melting #1: Sulfur (Making a Sulfur Coin)

Melting #1: Sulfur (Making a Sulfur Coin)

I’m going to be melting sulfur…

Sulfur is a chemical element with symbol S and atomic number 16. It is abundant, multivalent, and nonmetallic. Under normal conditions, sulfur atoms form cyclic octatomic molecules with a chemical formula S8. Elemental sulfur is a bright yellow crystalline solid at room temperature.

Sulfur Melting Point: 115 °C ( 239.38 °F)

20170805_093741 - Copy20170805_093807 - Copy

Yay! the sulfur is melting!

20170805_095205 - Copy

It took about 10 minutes to melt the sulfur. Now time to pour it into the mold!

20170805_094231 - Copy

OK, the sulfur hardened. Time to take it out the mold. I used a hammer to take it out.

20170805_100026 - Copy

No! that’s the ugly side. The better side is this:

20170805_100416
I used a hammer to take it out

20170805_100428


Wow, I’m actually impressed. You’re probably wondering why the sulfur is brown. Just wait a couple days and the coin will turn yellow. But once it turned yellow, it has a chance to crumble in a month. Because sulfur crystallization is a complicated process. The time it takes is mostly determined by the temperatures the substance was subjected to initially. I’ll be making another post to show you how the color changed.

Hope you enjoyed the experiment if you did, drop a like on the bottom ↓

Sources:

https://en.wikipedia.org/wiki/Sulfur

https://melscience.com/en/experiments/sulfur-melt/


The Silver Coin

The Silver Coin

What about this experiment? Remember the silver tree? That was a great experiment. Go over there and check it out (here: https://danupondrake.wordpress.com/2017/06/25/the-silver-tree/). The silver nitrate will stick to the copper coil and make crystals. But instead of copper coils, why don’t we try copper coins? It will be fun to try! Let’s get started then!

Let’s some coins from different countries.

Penny (19 mm diameter): The alloy remained 95 percent copper and 5 percent zinc until 1982, when the composition was changed to 97.5 percent zinc and 2.5 percent copper (copper-plated zinc) until now. Cents of both compositions appeared in that year.20170731_141057.jpg

50 Satang (Thai baht) (18 mm diameter): The core is 99% iron and cladding is 99% Copper.20170731_141106

10 Yen (Japanese Yen) (23.5 mm diameter): 95% copper, 3–4% zinc, and 1–2% tin.20170731_141232.jpg

To hang the coins in the beaker, I used paper clips to hold the coins…

…And tie rubber bands at each paper clips.20170731_143925 - Copy

I made the solution for the experiment and dipped the coins in there…

Now I just have to wait.

20170731_145314


30 Minutes later:


20170731_152348

The coins are just turning blacker. So I took the coins out and cleaned them.20170731_15315320170731_153124

The coins look different. The penny turn yellow-orange, the Satang turned darker, and the Yen turned yellow.

But I wonder why…

Maybe bec

Hope you enjoyed this post, if you did, tell me in the comment section ↓

Sources:

www.livescience.com/32401-whats-a-penny-made-of.html

https://en.wikipedia.org/wiki/Fifty-satang_coin

https://en.wikipedia.org/wiki/Japanese_yen

The Agar Test and Bacteria Culture

The Agar Test

I completely forgot about this exciting experiment. I did this experiment 2 years ago, but I don’t know what to call it. I will call it… The bacteria experiment. This experiment is to let you culture (grow) bacteria. But I’m not going to do that experiment today. I wanted to check my agar.

Agar is a jelly-like substance, obtained from algae. Agar is derived from the polysaccharide agarose, which forms the supporting structure in the cell walls of certain species of algae, and which is released on boiling.

Simply, agar is the bacterias’ food. Let’s look at it.20170707_190853

I used half of it. I store it in my refrigerator and hid it deep in there so nobody can see it. If my mom sees that, it will be in the garbage bin because she doesn’t like chemicals to be with food. Anyway, I’m going to check it to make sure that it works properly. Wait, what’s this?20170707_190901

Expires on September 10th 2015?

This would not work. But I hid it so well though 😂.

And store it at 2-8°C (36-46°F)? My ‘fridge is only 10°C.

This can’t work. But you know, it may work.

It’s still frozen, so I’m going to boil the whole bottle if I remember 2 years ago. I need to clean everything, even the container that it’s going to be boiled in. I don’t want it to be contaminated.

To do the test you’ll need:

Things you’ll need: 2 petri dishes, beaker, alcohol lamp, agar, gloves, towels, and Q-tips.

Warning: Make sure everything is clean.

  1. Boil the whole bottle of agar in the beaker. The agar will turn into liquid.20170708_092615
  2. Pour the agar into the petri dishes; half way.20170708_102827
  3. Use a Q-tip to collect bacteria. Rub it on dirty things (I used a shoe).
  4. Rub the Q-tip that is dirty on to one petri dish. Leave the other one alone.20170708_103632
  5. Place it in a dark place, cover it with half way a petri dish lid, and wait for 2-3 days.

If the dirty petri dish has dots on it and the other one doesn’t, your agar is fine.

If the dirty petri dish has nothing on it, the agar is bad.

But it looks like that it’s fine.20170709_182657.jpg

The clean one is one the left and the dirty is on the right.20170709_182703.jpg

The result is: my agar is fine.


%d bloggers like this: