Ah, the good old days and my craze for science experiments. It was a fun time but I’m starting to lose motivation and I also don’t want to waste money. Since I’m moving to the U.S.A., I had to sell all of my supplies to someone else and if I move there, I’ll need to buy all of my supplies again. I cannot do this hobby because I’m just bored of it.
You might be asking: “Dan, then what are going to post on this blog?”
I’ll be posting about other hobbies and blogging about myself.
Anyways, right now I’m still trying to get to U.S.A and I’ll get back “the WordPress grind.”
But I was thinking what would happen if you use superglue instead of just regular school glue.
Glue has long flexible molecules in it called polymers. These polymer molecules slide past each other as a liquid.
Borax in water forms an ion called the borate ion. When the borax solution is added to the glue solution, the borate ions help link the long polymer molecules to each other so they cannot move and flow as easily.
When enough polymer molecules get hooked together in the right way, the glue solution changes from being very liquidy to a rubbery kind of stuff that we call slime.
I was thinking what would happen if you replace superglue instead of just regular school glue.
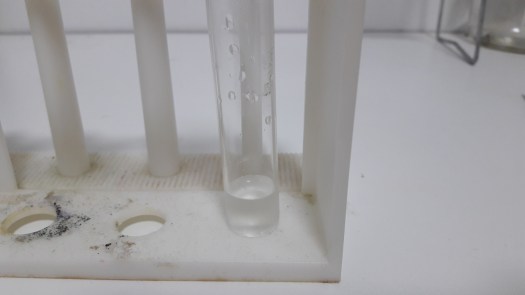
So here I have a 2% borax solution by adding 2 grams of borax into 200ml of water:
Now I’ll put one drop of superglue into the borax, just to see what happens.
The drop of super glue has turned into jelly. Now let’s add more:
The same thing happened. Then I decided to take it out with forceps:
The superglue instantly dries when it touches the air.
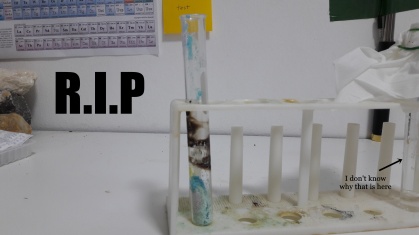
After that, I decided to put a teaspoon of borax into the solution and poured more superglue.
It dried up in the solution fast. I took the chunk of superglue out to inspect it. The superglue felt like hard foam. I pinched it with my hand, there are still some superglue that hasn’t dried inside since the borax can’t touch it.
That’s it! I think the experiment was too quick, and a little sloppy so I’ll try this experiment again and I’ll do a better one sometime later.
Also, I’m going to write a scientific report after every and each chemistry experiment. But this one is a little too short so I’m not going to write anything.
Moles are a unit of measurement of chemicals. A mole is the atomic weight of a molecule of the chemical in grams and it is used very commonly in chemistry, so I’m going to show you how to calculate molar mass.
You can find the molar mass right on the periodic table. On the table, there is the element symbol, the atomic number, and the molar mass.
Here I’ve got some elements:
Nitrogen’s molar mass is 14.0067 g/mol, for oxygen, it’s 15.9994 g/mol, and for silver, it’s 107.8682 g/mol.
The first method of finding the molar mass is to look right on the table (just like I did).
The second method is to add up the masses of each atom (.Add up the masses of the atoms that form the compound) I’ll show how with the chemical silver nitrate.
AgNO3
One Silver molecule: 107.8682 + one Nitrogen molecule 14.0067 + and three molecules of Oxygen: (15.9994 x 3)
107.8682 + 14.0067 + (15.9994 x 3) = 169.8731
AgNO3 = 169.87 g/mol
Let’s try another one:
NaOH
One Sodium molecule: 22.989769 + One Oxygen: 15.9994 + and one Hydrogen: 1.00794
22.989769 + 15.9994 + 1.00794 = 39.997 g/mol
NaOH = 39.997 g/mol
H2SO4
Two Hydrogens: (2 x 1.00794) + One Sulfur: 32.07 + Four Oxygens: (4 x 16.00)
(2 x 1.00794) + 32.07 + (4 x 15.9994) = 98.079 g/mol
H2SO4 = 98.079 g/mol
I hope you understand, leave a comment if you have any questions or if there are any mistakes ↓
Sometimes, I’m missing a couple of chemicals. The way to fix that problem is simply ordering them online, but I need it right now. So I decided to make my own chemicals by following procedures from the internet. For the first one, I’m going to be making basic copper carbonate (CuCo3).
First, I added about 85 grams of copper sulfate to a flask (I didn’t know why I put 86 g).
After that, I added 240 ml of distilled water and tried to dissolve all of the copper sulfate. And then, I put 30 grams of sodium carbonate into 60 ml of distilled water and did the same.
Next, I poured the sodium carbonate solution into the copper sulfate solution slowly and carefully. There were lots of fizzing and bubbles. What’s happening is: CuSO4 (Copper Sulfate) + Na2Co3 (Sodium Carbonate) + H2O → CuCO3 (Copper Carbonate) + Na2SO4 (Sodium Sulfate) + CO2
I added all of the sodium carbonate, and waited for one night to make the copper carbonate settle to the bottom.
After that, I filtered all of the copper carbonate out and let it sit for 2 days (to dry it).
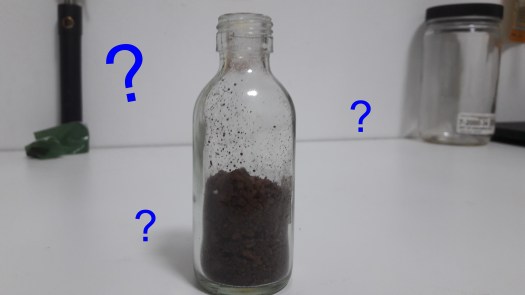
All of the copper carbonate is dried.
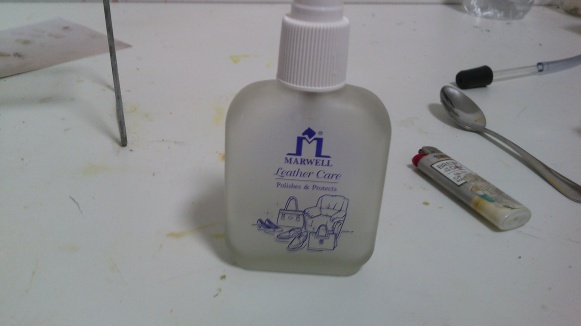
I’m actually impressed. I put it in a bottle and labeled it.
Well, I would have to thank the person in that video. The color and the texture of the chemical seems to be correct. I can use this chemical!
I hoped you enjoyed. Any suggestions? Feel free to comment down below ↓
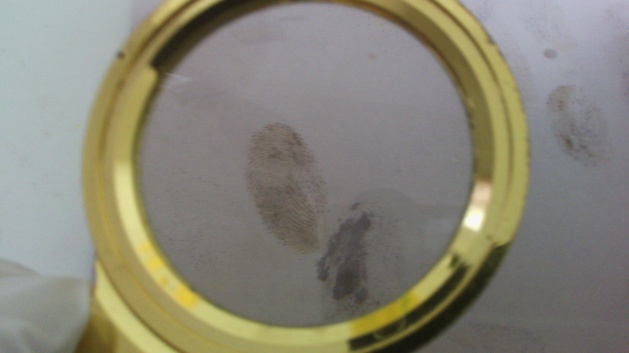
I sprayed it and I shone it with an LED lamp (a UV lamp is better).
Now I got this:
I didn’t know why it was a line like that, but it worked.
I didn’t find any other fingerprints and the fingerprint that I have is hard to see.
Well, this experiment is considered as a fail. I rather use the iodine fuming method that I used the last time. The silver nitrate reacts to the salt on the fingerprint and produces silver chloride, just like on the skin.
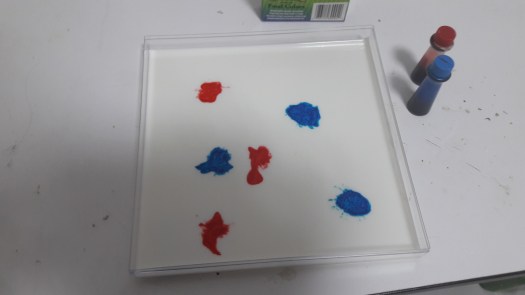
Fingerprints on glass, metal, and other surfaces can be revealed by dusting them with powder. I tried it twice already but it was very hard, so I found this method in my chemistry book.
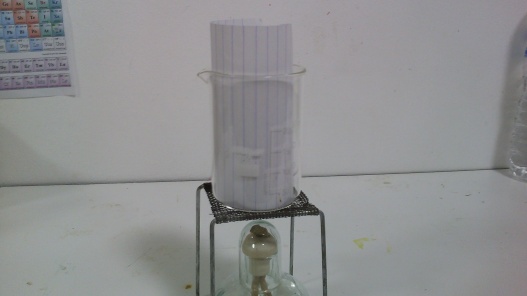
Position the paper in the beaker like this:
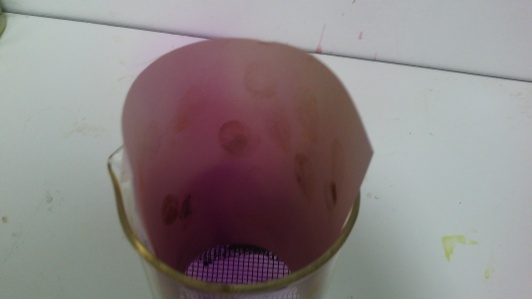
And put a gram of iodine crystals, that should be enough. It was already reacting and making stains. But It stopped, so I turned on the heat. About 10 seconds, vapors are forming quickly. (Becareful, if you wash your hands before touching paper, it’ll not work. Sweaty hands will work. Soap removes all of the oils and salts on the fingers.)
I love the vapors, it looks so beautiful.
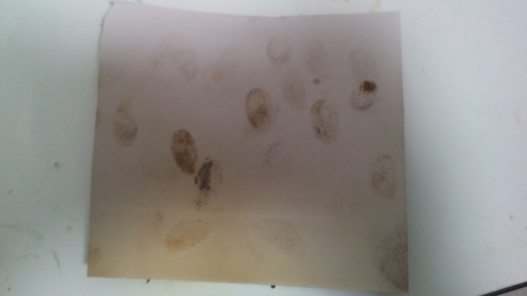
Here’s the paper:
I’m actually quite surprised that it worked so well! Definitely better than using powder.
It so clear that you could see it! But I had another idea. What would happen if I sprayed a little bit of cornstarch? Starch will turn iodine into an intense “blue-black” color (iodine-starch reaction). So I added a gram of cornstarch into 20 ml of water and put it in a spray bottle.
It works, but I didn’t spray more because the prints are already clear 🙂
How it works? Very simple. Iodine fuming was the first method to reveal fingerprints on surfaces. As the iodine is heating, purple vapors start to form. The iodine condenses to a solid and sticks fast to oils present in fingerprints, and of course, it reveals the fingerprints.
I hoped you enjoyed. This is now one of my favorite experiments.
Remember that experiment about mercury? I tried to show you that mercury can conduct electricity. And it did. I studied it a little bit more and I found this:
A Simple (Tilt) Mercury Switch:
It’s similar to the one we did the last time. Instead of tilting it around, what if you suck the mercury in and out. Isn’t that better? I’ll try to build one just for fun.
I made a hole in a little container (what don’t know what to call it) and put a syringe in there. Then, I poked holes in the bottom and glued 2 wires in, and poured the mercury in.
I realized that time passes so fast, it was about a week since I made a new post. I feel like it has been for only 3 days. Anyways, let’s get started with the post.
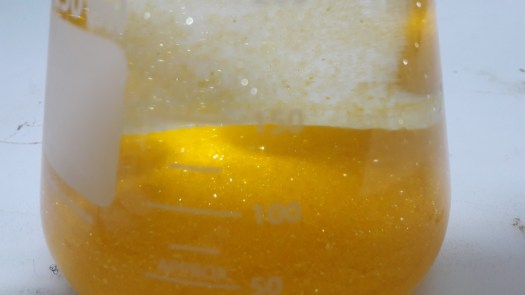
I’ll try to make Naphthalene crystals. Naphthalene is a white crystalline solid with a characteristic odor. It’s melting point is about 80°C. If you leave it to expose air, it’ll change into a gas.
My Naphthalene:
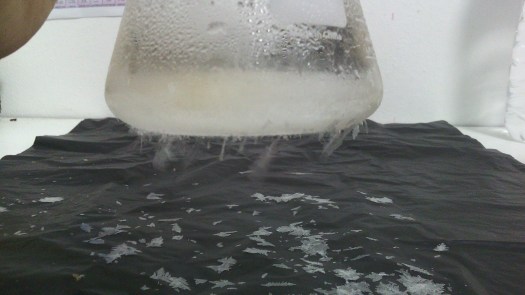
I put about 7 balls of Naphthalene into a 600 ml beaker, and I put a flask with cold water on top of it.
The Naphthalene is vaporizing quickly. The vapors will get in contact with the cold water in the flask and turn back into a solid.
Crystals are also forming in the beaker, because it’s touching the cold air outside, just like what’s happening in the flask.
All of the Naphthalene has changed into liquid, it was boiling a little too fast so I stopped the heat.
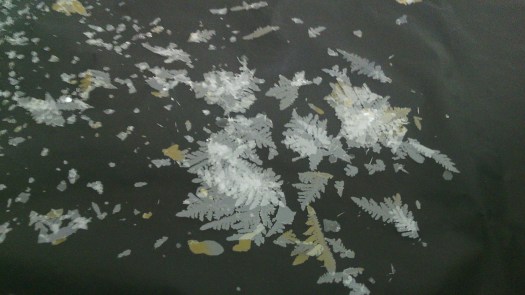
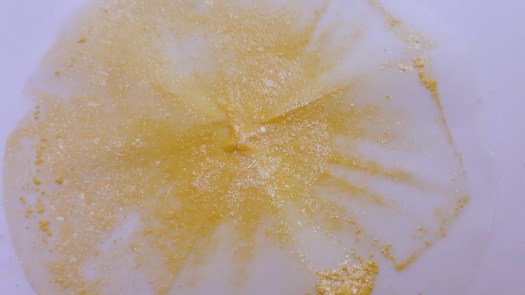
The crystals are so fragile so I used a trash bag to make the crystals fall onto it.
Here are the crystals. They look like fern leaves and snowflakes! But I wish the crystals were chunks, not thin like this. I looked in the internet for pictures of Naphthalene crystals, and they’re just like mine. The reason that it’s yellow is because the light is just reflecting it.
Here’s the beaker:
I hoped you enjoyed the post, if you did, drop a like down below ↓
I think today is the time to clean my sink. I can’t have a dirty sink; If I have one, I’m going to turn into a sloppy chemist. Being clean and neat in life brings success to you (that just means being clean is good).
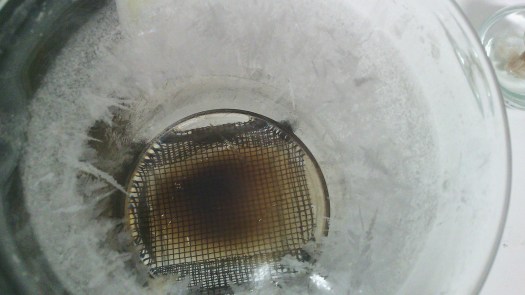
Here’s my dirty sink, tons of stains in there.
Before I had this sink, I had to use the kitchen sink. My mom didn’t like the chemicals contaminating the kitchen, so my dad bought this sink for me. My dad almost bought a bathroom sink (the white ones), but they’re expensive so he bought this for me. If I had a bathroom sink, I won’t make this post (because I’m embarrassed).
This is a mess…
I don’t know why I’m posting this though…
After a little bit of scrubbing, the sink is good as new. There’re still some stains but I can’t clean them. The way that home chemists dispose their chemicals is to wash it down with a lot of water. But the most important thing is the sink is clean.
Turning a Coin to Silver and Gold (Simple Redox Reaction)
This simple experiment will make you understand the redox reaction. This is one of my favorite experiments so I decided to make a post about it.
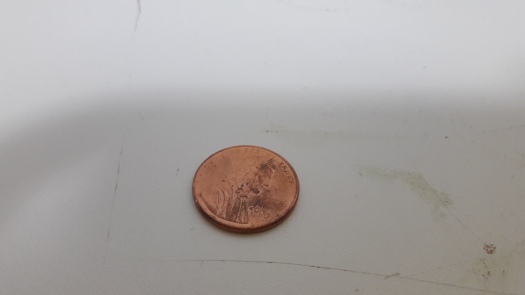
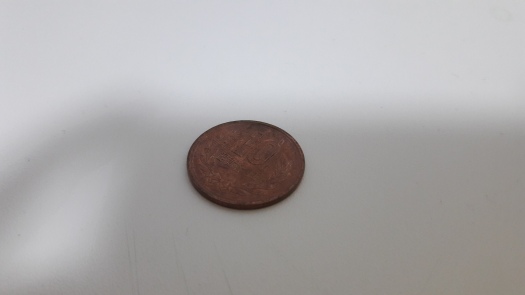
Things you’ll need: a copper coin (a penny, basically), zinc powder, sodium hydroxide (more than 50%), alcohol lamp, forceps, and a beaker.
Pour Sodium Hydroxide into a beaker and pour some zinc dust in it, enough to cover the coin.
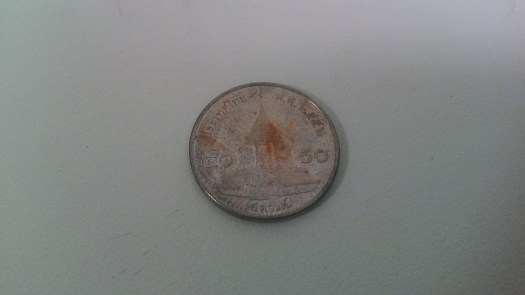
Put the coin the beaker and wait for a couple hours, I’ll be using my country’s copper coin.
Take the coin out with forceps and wash it with water, now you have a silver coin.
If you want to continue, do the following steps: Make sure the coin is dry. Heat it up with an alcohol lamp until it’s yellow.
Enjoy.
An oxidation-reduction (redox) reaction is a type of chemical reaction that involves a transfer of electrons between two chemicals. A redox reaction is any chemical reaction in which the oxidation number of a molecule, ion, or atom changes by losing or gaining an electron. For example, like this experiment, the zinc transferred its ions to the copper; that’s how the coin turned silver, and that’s why this is a redox reaction. What about turning it to gold? The color of silver and copper are just mixing together when heated and that makes the gold color.
Do Water Vapors Effect the Mass of Copper (II) Sulfate?
The pentahydrate form, which is blue, is heated, turning the copper sulfate into the anhydrous form which is white, while the water that was present in the pentahydrate form evaporates. I wanted to know if water vapors affect the mass of copper sulfate.
Things you’ll need: crucible, balance, Copper (II) Sulphate, spoon, alcohol lamp, and stand.
Weigh the crucible and tare it. After that, put 5 grams of copper (II) sulfate into the crucible. My crucible weighs 50.41 grams as shown on the bottom.
Warm it up until it turns white
Let everything cool off and weigh the crucible.
I had an error during this experiment… The balance’s batteries are out… So I had to take the copper sulfate out and reweigh the crucible. One of my epic fails…
Crucible: 50.41 grams
Copper (II) Sulfate: 5.00 grams
Anhydrous Salt: 3.43 grams
Mass loss: 1.57 grams
I pour in some water to get to the original mass, and it appears that I poured in about 1 and a half ml of water.
Hope you enjoyed, if you did, drop a like down below ↓
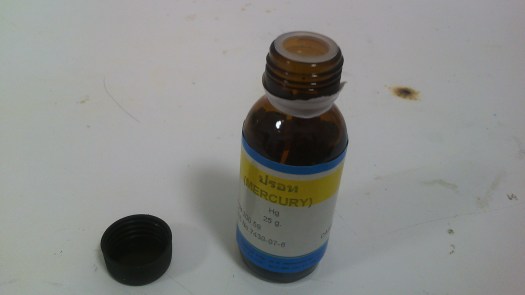
I bought this from my science shop yesterday so that I could perform more experiments.
Why is it a liquid?
The reason for mercury being a liquid is complex. It is heavy; a chunk of iron can float on mercury. Compared to other metals, it does not conduct heat well. However, it conducts electricity fairly well.
Mercury is the only metal that is a liquid at normal temperatures and pressure. What makes mercury so special? Basically, it’s because mercury is bad at sharing… electrons, that is.
Most metal atoms readily share valence electrons with other atoms. The electrons in a mercury atom are bound more tightly than usual to the nucleus. In fact, the s electrons are moving so fast and close to the nucleus they exhibit relativistic effects, behaving as if they were more massive than slower-moving electrons.
Why does it conduct electricity?
Mercury is a liquid metal. As with all metals, the outer electrons are detached from the nuclei and form a kind of “sea of electrons” in which the rest of the atoms sit. A small electrical force, in other words a voltage, placed across any two points in this sea will make the electrons move, and that constitutes a current and makes a metal electrically conducting.
I wanted to see that mercury can conduct electricity. I opened mercury bottle, it has an inner closure, I’m not going to take it out because we need it.
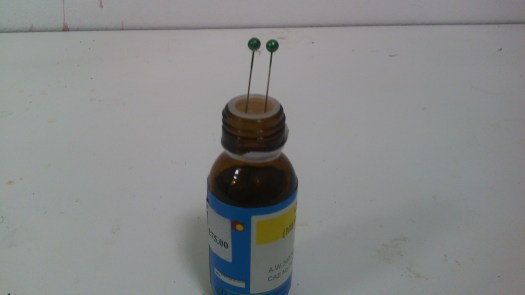
I’m going to put pins in it.
I will flip the bottle and the mercury will be in contact with the pins and the circuit will turn on.
It works nicely!
This chemical will go into my favorite chemical list!
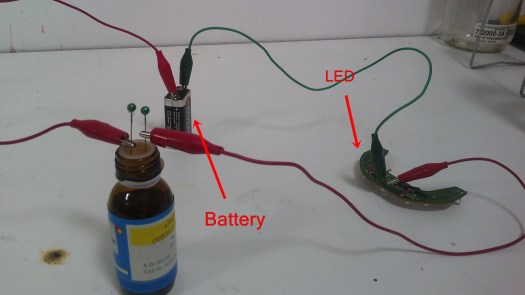
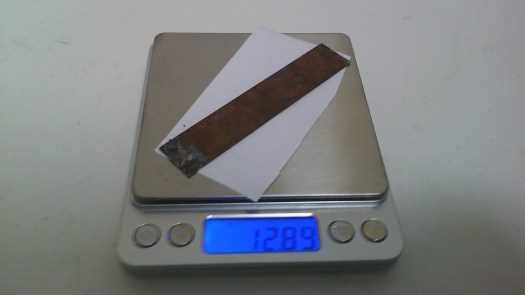
I’ve never used a copper stick in one of my experiments, I found out that I’m good at plating, which is what we’re going to be doing in this post. You probably wondering why my copper is a green, it’s because of chemical reactions with the elements. Just as iron that is left unprotected in the open air will corrode and form a flaky orange-red outer layer.
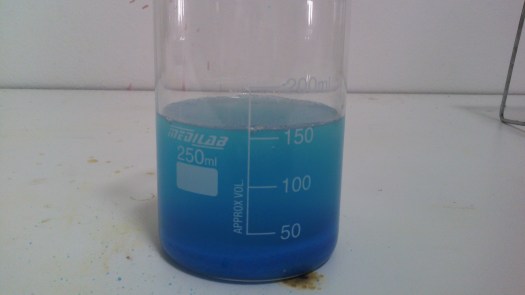
First, warm up some distilled water, which is what I’m doing above. Heated up until about 45°C. Don’t go too hot with the water because it’ll accelerate the plating and form crystals, which is what we don’t want.
To be honest, I’m not actually following any instructions though, so I’m not sure if this is going to work.
Mix the distilled water with scoops of copper sulphate, I don’t know how much to put in there, so I put about… 100 grams I guess.
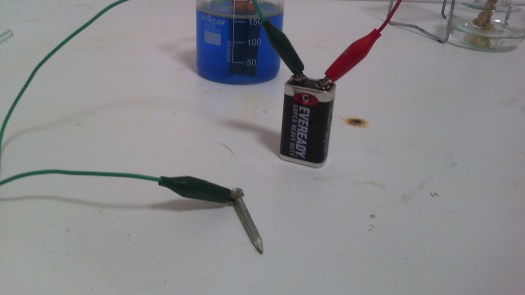
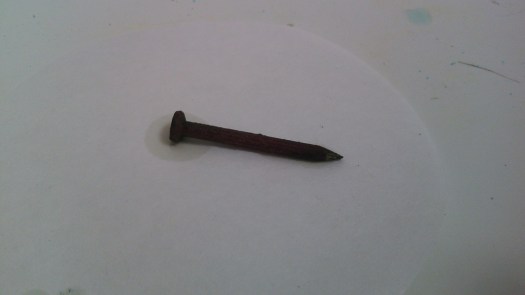
What I’m going to be plating is this iron nail. I connect the nail to (-) and the copper to (+). What’s happening now is simple: the copper ions (+) is charging to the metal. Copper (which are positively charged) are attracted to the negatively charged iron electrode and slowly deposit on it—producing a thin layer of copper plate. The electrolyte just helps ions to move around.
I shook the nail around because the copper will only go to one side.
Now the nail is all covered in copper but…..
The copper is falling off, easily…
I tried with a stick that metal and some aluminum mixed in it. But it still falls off.
The common problem is the electrolyte, as said above it accelerates the plating and makes crystals, but the water is about 35°C. Or the other problem is too much copper sulfate…
Can you tell me what the problem is? If you know, comment down below↓
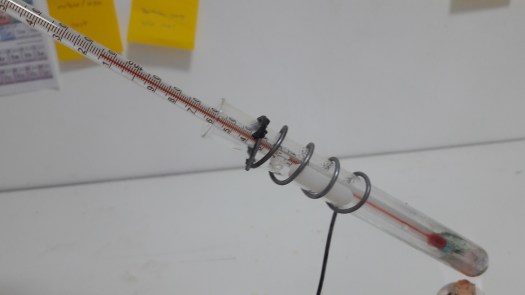
After that long break, I would like to do a very simple experiment to start. This one is pretty common, most people probably know this experiment, but no one realized that there was more to it.
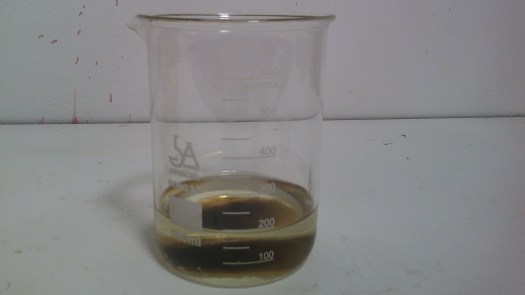
Things you’ll need: Yeast, hydrogen peroxide, a beaker, and a thermometer.
Pour 200 ml of hydrogen peroxide into a beaker.
Insert the thermometer and look at the temperature.
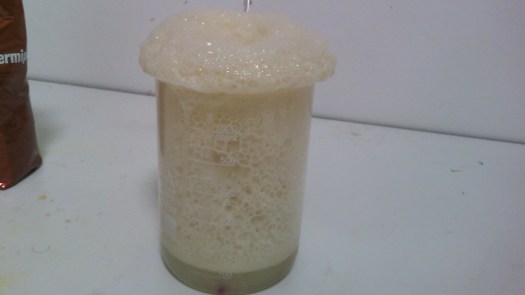
Add some yeast, not too little, stir it into the hydrogen peroxide.
Keep waiting, the temperature will be high.
My temperature is about 63°C. That’s very hot. You saw the temperature change. The energy in the chemicals was converted to heat energy by the chemical change. You must know the yeast + H2O2 reaction, so I’m not going to explain it. This is also another way to create the elephant’s toothpaste demonstration.
Thanks for taking your time to look at this post 🙂
Silica gel is a granular, vitreous, porous form of silicon dioxide made synthetically from sodium silicate. Silica gel contains a nano-porous silica micro-structure, suspended inside a liquid. Most applications of silica gel require it to be dried, in which case it is called silica xerogel. For practical purposes, silica gel is often interchangeable with silica xerogel. Silica xerogel is tough and hard; it is more solid than common household gels like gelatin or agar. It is a naturally occurring mineral that is purified and processed into either granular or beaded form. As a desiccant, it has an average pore size of 2.4 nanometers and has a strong affinity for water molecules.
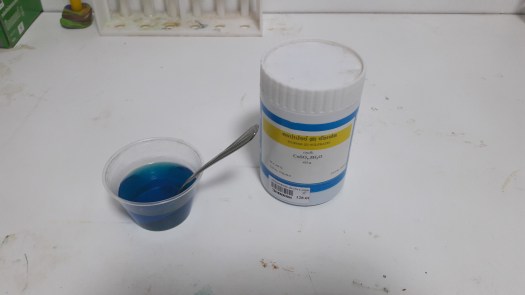
This is how it looks like (I got this one from a medicine bottle):
Silica gel is most commonly encountered in everyday life as beads in a small (typically 2 x 3 cm) paper packet. In this form, it is used as a desiccant to control local humidity to avoid spoilage or degradation of some goods. Because silica gel can have added chemical indicators and absorbs moisture very well, silica gel packets usually bear warnings for the user not to eat the contents.
Because Silica gel is non-toxic, non-flammable, and non-reactive and stable with ordinary usage. It will react with hydrogen fluoride, fluorine, oxygen difluoride, chlorine trifluoride, strong acids, strong bases, and oxidizers. Silica gel is irritating to the respiratory tract and may cause irritation of the digestive tract, and dust from the beads may cause irritation to the skin and eyes, so precautions should be taken.
Silica gel’s high specific surface area (around 800 m2/g) allows it to absorb water readily, making it useful as a desiccant (drying agent). Silica gel is often described as “absorbing” moisture, which may be appropriate when the gel’s microscopic structure is ignored, as in silica gel packs or other products.
An aqueous solution of sodium silicate is acidified to produce a gelatinous precipitate that is washed, then dehydrated to produce colorless silica gel. When a visible indication of the moisture content of the silica gel is required, ammonium tetrachlorocobaltate(II) (NH4)2CoCl4 or cobalt chloride CoCl2 is added. This will cause the gel to be blue when dry and pink when hydrated. An alternative indicator is methyl violet which is orange when dry and green when hydrated. Due to the connection between cancer and cobalt chloride, it has been forbidden in Europe on silica gel.
Once saturated with water, the gel can be regenerated by heating it to 120 °C (250 °F) for 1–2 hours. Some types of silica gel will “pop” when exposed to enough water. This is caused by breakage of the silica spheres when contacting the water.
Now let’s play with it.
I got these from two packets, that’s why there’s so many.
I put about 5 ml of water into this little graduated cylinder. After that, I poured the gel in there and wait for a couple minutes.
Time to measure the water.
Look at that, the water went down about 1.4 ml. It actually absorbs water. I wish I could weigh the gel though.
Did you learn anything? If you did, drop a like below ↓
The last time we used test tubes and destroyed all of them! So I’m going to use a beaker.
I put the copper sulfate in it and going to burn it.
It’s white now. I’ll drop water on it.
It worked!
I’m guessing that it works like this: I took the water molucles out by evaporating the water, now I have this white dust without water in there, and when I added the water, it turned back to blue (it’s like adding the water molucles back to it). This is why I love chemistry. It’s so awesome!
In the last time: I extracted water from Copper (II) Sulfate, and I would like to test it. What I would like to know is: can we drink it. Let’s find out.
The liquid
I didn’t use a rubber stopper to close the test tube because the new test tubes didn’t fit it. At least, I can close it with a tissue.
The first thing that I always do when I test liquids is to check the PH.
A better tool for this task is a PH meter, but I don’t have one. So I have to use the old-fashioned litmus paper.
The left piece of paper is the liquid that we’re testing now and the right is drinking water from bottles (not tap water). And on the top is a chart of what the litmus paper is indicating. Looks like the liquid is acidic and the drinking water is about in the middle.
It smelled like plastic when I smelled the liquid, I’m guessing it’s because the rubber tube that I used is heated and the plastic smell comes out.
After that, I thought about PH indicators. I used Phenolphthalein, Bromothymol blue, and Methyl orange. Phenolphthalein is colorless from 0 PH to 8.3 PH, Bromothymol blue will be yellow from 1 to 6 PH, and Methyl orange is red from 1 to 3.1 PH.
Well, I guess you can’t drink it. I thought that I could manufacture water from it.
Thought it will work but I guess the only place you could obtain water is from nature 🙂
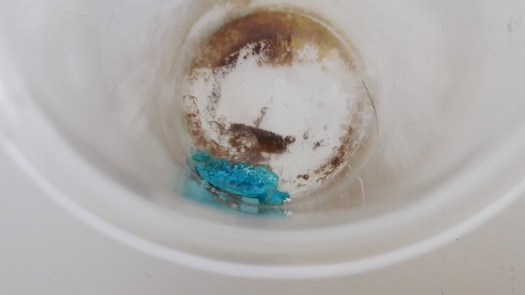
Well, the last time, we tried to melt copper (II) sulfate, and it didn’t work at all. But there’s this water vapor from it:
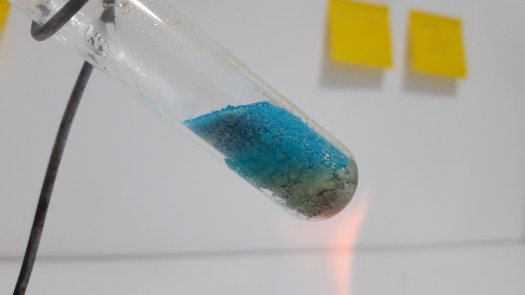
What I wanted to do today, is to extract the water out of it and test it. It loses two water molecules when heating at 63 °C (145 °F), two more at 109 °C (228 °F), and the final water molecule at 200 °C (392 °F). What are we waiting for? Let’s get started!
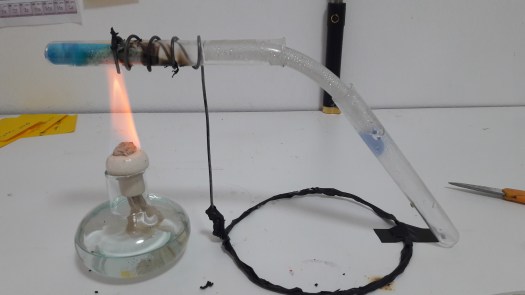
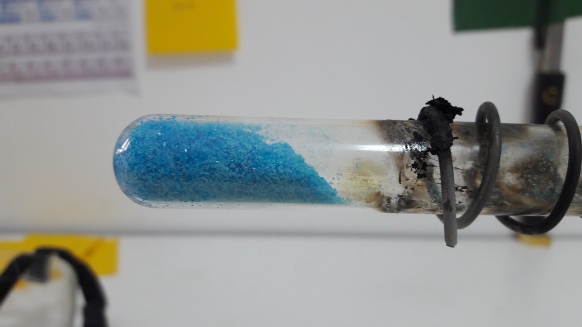
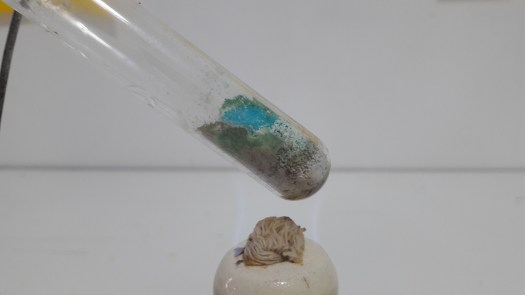
OK, I’ve setup this apparatus to extract the liquid. On the top left is the copper sulfate in a test tube. I’m going to heat it up and water vapor will go into the plastic tube and go into the test tube.
Turned on the heat and we just need to wait.
Yay! it’s working!
There is so much water coming in!
I turned off the heat because most of the water is extracted, I’m going to put some more in there.
I added a new load of copper sulfate to get more liquid, but… the test tube….
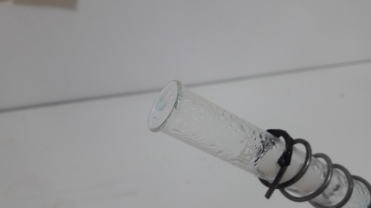
I added some cold water in the beaker on the test tube that’s receiving the liquid because I think that using a cold temperature will turn the water vapor into drops of water before the water vapor escapes from the test tube.Water vapor turns into liquid droplets when cooled. That is called condensation, it’s the opposite of evaporation. Let’s see if this works.
All right, finished. I think the second method works better. And the best thing is: we got some liquid! I’m going to make a separate post about testing this liquid.
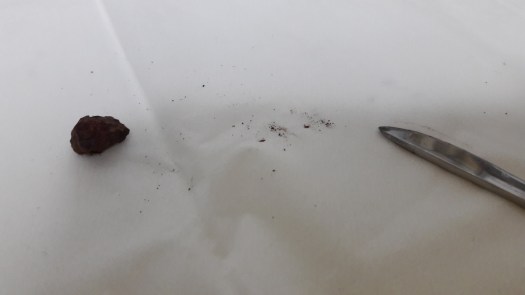
I cracked one of the tiny stones and the inside was black:
I guess the color has been covered by some other minerals or the color on the outside has been changed from weathering. Remember, the color of magnetite is always black.
Also, I did the streak test. The “streak test” is a method used to determine the color of a mineral in powdered form. The color of a mineral’s powder is often a very important for identifying the mineral. The streak test is done by scraping a specimen of the mineral across a piece of unglazed porcelain known as a streak plate. I don’t have a streak plate so I used a scalpel to scratch it and the dust is black. The color of the dust must be black as well.
Today, magnetite is mined as iron, that means I can claim that this is iron.
Well, another mineral is added to my collection. Just a couple more to go and this collection will be finished.
What Happened to the Sulfur Coin? (Sulfur science and can the coin melt again?)
The coin:
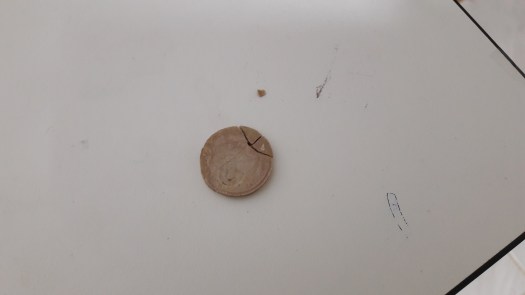
Now, what happened to that coin? It was 10 days since I made it, and I wanted to show you what happened. Here’s the coin:
The coin has turned white and it came apart into a couple pieces… I guess it’s useless now, but I was wondering, can I melt it again? Let’s try it.
Can we melt it again:
Yes! Look at this:
It’s melting just fine. It started melting in ten seconds (very quick). I’m guessing you could melt it as many times as you want just like the other metals.
Sulfur Science:
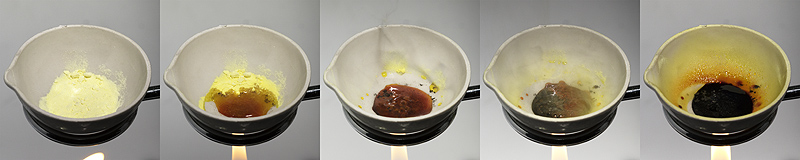
Why does yellow sulfur turn black when heated?
The internal structure of sulfur changes under heating. From stable at room temperature crystalline form of yellow color it turns into its plastic form, which has no specific internal structure. This changes the color of the substance: initially yellow sulfur becomes red-brown, and then black.
When heated above 119oC sulfur crystals melt and form a reddish-orange liquid, also consisting of S8 molecules. At temperatures even higher the sulfur ring molecules break, forming “strings” of atoms linked with one another. Exactly the occurrence of linear molecules makes molten sulfur black. These “strings” can bond their free ends to each other, forming very long molecules. As a result, the liquid sulfur thickens due to the “clumsiness” of large molecules. They can be compared to threads: the greater their length, the easier they get tangled with each other. If the black viscous liquid is heated to 187oC, it will become maximally dense (plastic sulfur). At temperatures higher yet still, the bonds in long molecules are destroyed once again, and the mass becomes thinner. Maximally runny black sulfur becomes at 400oC, and boils at 445oC.
Why does the coin change its color over time?
A substance always aims to take its most stable form. Black plastic sulfur is not stable under normal conditions. Therefore, it gradually changes its internal structure, crystallizes and turns into yellow rhombic sulfur.
The black figurine is made of very long molecules of sulfur Sn. Such an internal structure of the substance is stable only at high temperature. It can be temporarily stabilized only by quick cooling. At room temperature, long molecules gradually “break”, and their fragments form ring molecules S8. The latter form crystals of rhombic sulfur, which is the only allotropic modification of sulfur, stable at room temperature. In addition to color change, changes in other physical properties also occur. The figurine becomes fragile and eventually shatters. This process cannot be prevented, but it is very interesting to watch.
The coin turned yellow and crumbled in a couple days
Well, nothing is actually wrong here. Sulfur crystallization is a complicated process. The time it takes is mostly determined by the temperatures the substance was subjected to initially.“
The last time we melted sulfur, and it was really fun (except for cleaning the test tube). Now let’s melt something else, what about Copper Sulfate?
Copper (II) sulfate is the inorganic compound with the chemical formula CuSO4. Older names for this compound include blue vitriol, bluestone, vitriol of copper, and Roman vitriol. The pentahydrate (CuSO4·5H2O), the most commonly encountered salt, is bright blue.
Melting Point: 110 °C (230 °F)
Sulfur’s melting point is 5 °C higher (which means they’ll melt about the same time).
It looks impossible to melt it because the sulfur is more (soft) like a powder, but this one is tiny crystals. Let’s give it a try anyway.
Light the lamp!
OK, it’s heating it up nicely.
A couple minutes later:
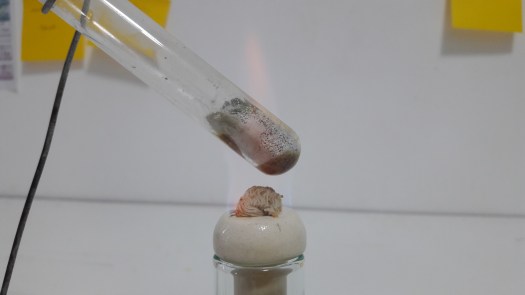
The copper sulfate is turning whiter, but still, all of it still remains solid.
But look. There’s water vapor in there. That’s weird, maybe there’s too much heat? But the sulfate didn’t melt yet.
10 minutes later:
The sulfur melted already at this time. But the sulfate still remains a solid and it’s just turning whiter.
20 minutes later:
This is taking forever! It’s not melting. Did I do something wrong?
It’s 115 °C already, and the temperature can go further.
I guess it won’t melt anymore so I turned off the heat.
Wow! this experiment is a fail. I wonder why it has water vapors? Why is it turning white? When is it actually going to turn to liquid?
Any ideas why it didn’t melt? Feel free to comment down below ↓
Sulfur is a chemical element with symbol S and atomic number 16. It is abundant, multivalent, and nonmetallic. Under normal conditions, sulfur atoms form cyclic octatomic molecules with a chemical formula S8. Elemental sulfur is a bright yellow crystalline solid at room temperature.
Sulfur Melting Point: 115 °C ( 239.38 °F)
Yay! the sulfur is melting!
It took about 10 minutes to melt the sulfur. Now time to pour it into the mold!
OK, the sulfur hardened. Time to take it out the mold. I used a hammer to take it out.
No! that’s the ugly side. The better side is this:
I used a hammer to take it out
Wow, I’m actually impressed. You’re probably wondering why the sulfur is brown. Just wait a couple days and the coin will turn yellow. But once it turned yellow, it has a chance to crumble in a month. Because sulfur crystallization is a complicated process. The time it takes is mostly determined by the temperatures the substance was subjected to initially. I’ll be making another post to show you how the color changed.
Hope you enjoyed the experiment if you did, drop a like on the bottom ↓
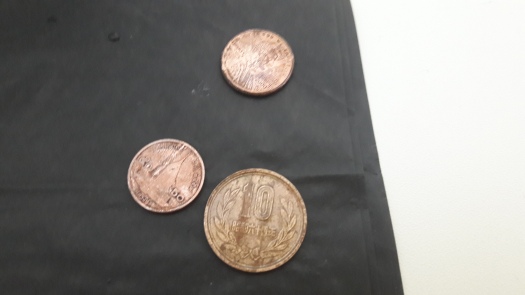
Remember the coin experiment that I performed lately?
When I washed the coins, they looked different.
But why?
I finally figured out the answer.
Copper metal is oxidized by the Ag1+ to Cu2+ and the Ag1+ ions are reduced by the copper metal to silver metal.
But do you remember what the coins are made of?
Penny: The alloy remained 95 percent copper and 5 percent zinc until 1982, when the composition was changed to 97.5 percent zinc and 2.5 percent copper (copper-plated zinc) until now. Cents of both compositions appeared in that year.
50 Satang (Thai baht): The core is99% iron and cladding is 99% Copper.
10 Yen (Japanese Yen): 95% copper, 3–4% zinc, and 1–2% tin.
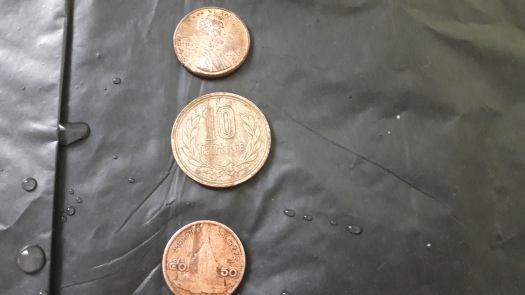
The Penny turned yellow-orange because the zinc was mixed with copper.
The Thai coin turned darker because of the iron.
The Japanese coin turned yellow because of the zinc and tin. Tin is light yellow and zinc is gray.
I hope you enjoyed that experiment, if you did, comment down below ↓
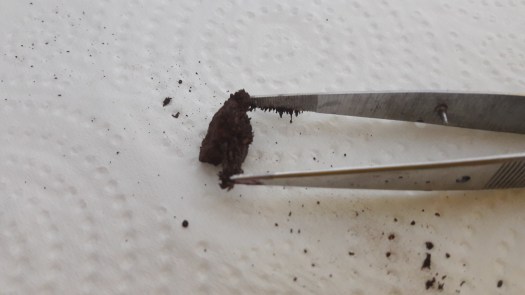
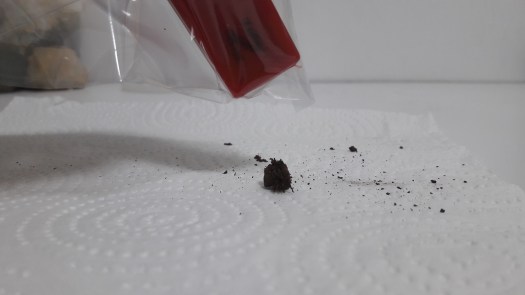
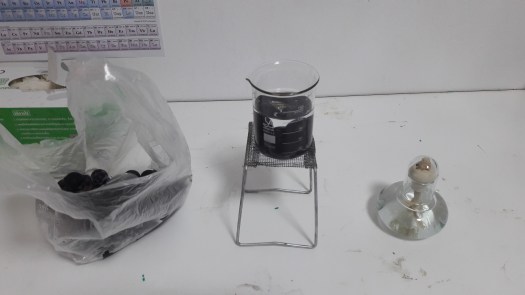
Today I wanted to identify this brown dust. I found the dust by me. I accidentally dropped a magnet on the ground and the dust sticks to the magnet. So I collected it to perform some experiments with it. So in this post, I’m going to identify this dust. Let’s perform some tests.
This dust could be two things:
Magnetite: Magnetite is a mineral and one of the main iron ores. It is one of the oxides of iron. Magnetite is ferrimagnetic; it is attracted to a magnet and can be magnetized to become a permanent magnet itself. It is the most magnetic of all the naturally-occurring minerals on Earth. Naturally-magnetized pieces of magnetite, called lodestone, will attract small pieces of iron, which is how ancient peoples first discovered the property of magnetism.
Magnetite is very easy to identify. It is one of just a few minerals that are attracted to a common magnet. It is a black, opaque, sub metallic to a metallic mineral with a Mohs hardness between 5 and 6.5. It is often found in the form of isometric crystals.
But magnetite is brown and my dust is brown…
Iron: Elemental iron occurs in meteoroids and other low oxygen environments, but is reactive to oxygen and water. Fresh iron surfaces appear lustrous silvery-gray but oxidize in normal air to give hydrated iron oxides, commonly known as rust.
My dust is brown, so it be iron.
The dust has tiny chunks of stone in there too.
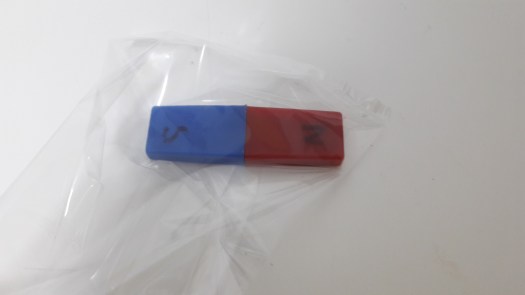
1. Magnet Test:
I used a rare earth magnet to see if it attracts. Of course, that’s how I found it. This could mean that it’s iron or magnetite.
2. Iron Test:
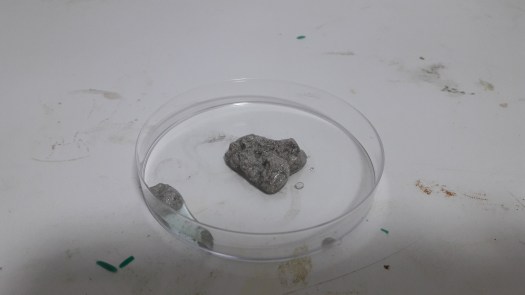
I poured the Dust onto a Petri dish. And I mixed a chain of paper clips in there. And it turns out that tiny pieces of the dust are on the paper clips. This probably means that the dust is magnetite.
I tried to make the tiny stones stick onto the paper clips but didn’t work.
3. Reacting to Magnet Test:
When I used the forceps to carry a piece of tiny stone onto a piece of paper, some of the dust is sticking onto the stone!
Let’s ignore that for now.
I wrapped a magnet in a plastic bag, in case the dust sticks on it (you wouldn’t be able to take the dust of the magnet. If you take off the plastic bag, the dust will come off).
I took the north pole of the magnet and hover it over the small stone. The dust on the stone is attracting to the magnet, but some of them don’t. When I used the south pole of the magnet, the dust that isn’t attracting to the north pole is attracting to the south pole.
After all of these tests, I think the dust is tiny pieces of magnetite. But I’m not sure, because magnetite is black. My final answer is: I don’t know… Scientists shouldn’t publish the results when they’re not sure. And that’s why my answer is I don’t know.
I’ll need to do some more tests with it to make sure…
What do you think it is? Let me know in the comment section↓
What about this experiment? Remember the silver tree? That was a great experiment. Go over there and check it out (here: https://danupondrake.wordpress.com/2017/06/25/the-silver-tree/). The silver nitrate will stick to the copper coil and make crystals. But instead of copper coils, why don’t we try copper coins? It will be fun to try! Let’s get started then!
Let’s some coins from different countries.
Penny (19 mm diameter): The alloy remained 95 percent copper and 5 percent zinc until 1982, when the composition was changed to 97.5 percent zinc and 2.5 percent copper (copper-plated zinc) until now. Cents of both compositions appeared in that year.
50 Satang (Thai baht) (18 mm diameter): The core is99% iron and cladding is 99% Copper.
10 Yen (Japanese Yen) (23.5 mm diameter): 95% copper, 3–4% zinc, and 1–2% tin.
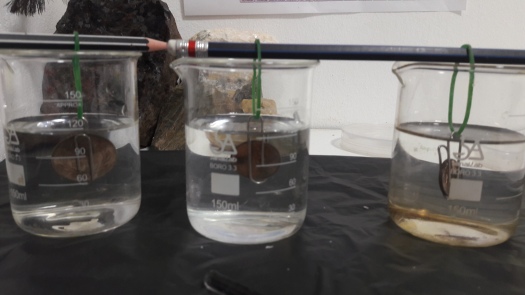
To hang the coins in the beaker, I used paper clips to hold the coins…
…And tie rubber bands at each paper clips.
I made the solution for the experiment and dipped the coins in there…
Now I just have to wait.
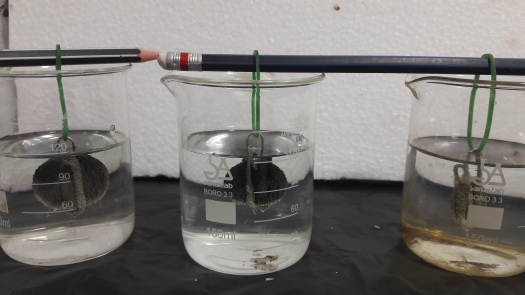
30 Minutes later:
The coins are just turning blacker. So I took the coins out and cleaned them.
The coins look different. The penny turn yellow-orange, the Satang turned darker, and the Yen turned yellow.
But I wonder why…
Maybe bec
Hope you enjoyed this post, if you did, tell me in the comment section ↓
The silver tree was beautiful, now let’s perform a golden experiment. This experiment kind of failed and pass. What I mean is that the experiment failed, and it was a success, you know what I mean. So don’t trust my steps, but be sure to follow the video at the end of this post.
This experiment is hard. Even I fail. So you shouldn’t handle this unless you’re an experienced chemist.
Things you’ll need: potassium iodide, lead (II) ni- (wait, why am I posting this even it’s a fail? Ok then, I’ll show you what I did).
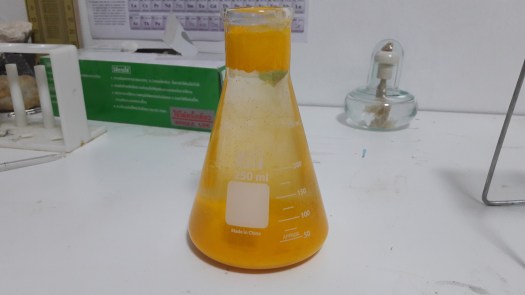
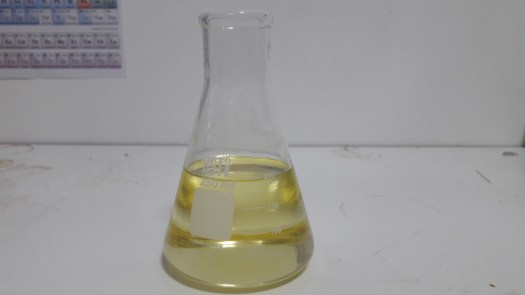
This is when I took the flask from the alcohol burner. Yup, it looks like a disaster. This doesn’t even look like the video! Well to the next photo.
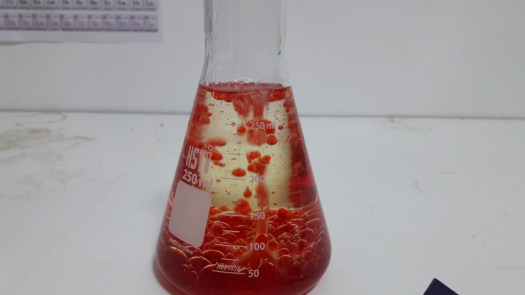
Yay! it worked! You could see the shiny particles coming down to the bottom. Success and fail. It looked really nice, I like this experiment.
Yes, Gold, Au everywhere!
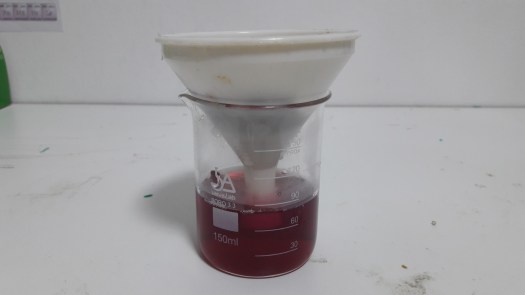
This is when I filtered it out. Looks like golden paint.
A closer look.
This is the water that is filtered out. It still has some golden particles in it.
Well, after all of these photos I would say that it’s a success. Follow the video to do it:
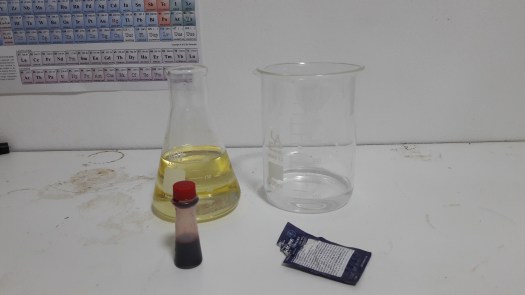
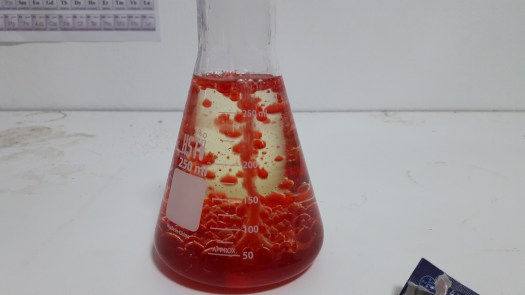
Golden rain demonstration is made by combining two colorless solutions, potassium iodide solution and Lead(II) nitrate solution at room temperature to form yellow precipitate. During the chemical reaction, golden particles gently drop from the top of erlenmeyer flask to bottom, similar to watching the rain through a window. The golden rain chemical reaction demonstrates the formation of a solid precipitate. The golden rain experiment involves two soluble ionic compounds, potassium iodide (KI) and lead(II) nitrate (Pb(NO3)2), as formular : Pb(NO3)2 + 2KI → 2KNO3 + PbI2. They are initially dissolved in separate water solutions, which are each colorless. When mixed, a the lead from one solution and the iodide from the other combine to form lead(II) iodide (PbI2), which is insoluble at low temperature and has a golden bright yellow color. At higher temperature, this substance easily re-dissolves by dissociation to its colorless ions. To explain, a double displacement reaction occur when potassium iodide and lead(II) nitrate mixing together causing metals changing their position in both two compounds forming lead (II) iodide and potassium nitrate. Lead iodide is strong insoluble in water at room temperature causing yellow precipitate of lead iodide.
On the second and first experiments, I used chemicals. But this time, I’m going to use grapes. Grapes contain a pigment molecule called flavin (an anthocyanin). This water-soluble pigment is also found in apple skin, plums, poppies, cornflowers, and red cabbage.
Things you’ll need: Black grapes, alcohol lamp, beaker, water, test tubes, test tube holder, vinegar, borax, a funnel, and a pipet.
Put grapes into the beaker and fill it with water until it’s above the grapes.
Set the alcohol lamp (you can use a stove instead of the lamp and a pot instead of a beaker).
Wait until the water boils, then turn off the heat and let it cool.
Use the funnel to take the grapes out.
Pour vinegar into the first test tube. Pour water in the second. And pour water + borax into the third. Now we have acid to base.
Drop 2-3 drops of the grape juice into the test tubes (if nothing happens keep adding the grape juice).
Very acidic solutions will turn anthocyanin a red color. Neutral solutions result in a clear color. Basic solutions appear in greenish-yellow. Therefore, it is possible to determine the pH of a solution based on the color it turns the anthocyanin pigments in grape juice.
Extra steps:
7. Pour the first and the third test tube together.
Salt (NaCl) is a natural mineral made up of white cube-shaped crystals composed of two elements, sodium, and chlorine. It is translucent, colorless, odorless (officially, though we think you can smell the freshness of the sea in one of our boxes) and has a distinctive and characteristic taste. Salt occurs naturally in many parts of the world in mineral form and has been mined for thousands of years. Chemically, sea salt is the same.
Gastronomically, it’s very different. I’m going to show you how salt can be separated out of water.
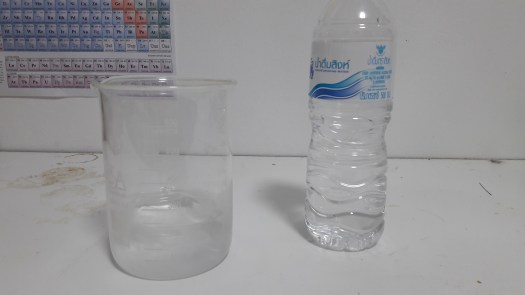
Things you’ll need: a beaker, water, salt (ocean water would be better), and an alcohol lamp.
Mix 50 ml water with 19 grams of salt together, stir the solution until dissolve.
Light the alcohol lamp and place the beaker on the stand.
Wait until the water is all gone (don’t let the salt be in there for too long, or it will burn)
Here’s my salt. It’s fluffy and soft like snow when I touched it.
I wish I could weigh it and see the difference from where I started.
Salt evaporation ponds, also called salterns, salt works or salt pans, are shallow artificial ponds designed to extract salts from sea water or other brines. The seawater or brine is fed into large ponds and water is drawn out through natural evaporation which allows the salt to be subsequently harvested. The ponds also provide a productive resting and feeding ground for many species of waterbirds, which may include endangered species. The ponds are commonly separated by levees.
Natural salt pans are geological formations that are also created by water evaporating and leaving behind salts. Some salt evaporation ponds are only slightly modified from their natural version, such as the ponds on Great Inagua in the Bahamas, or the ponds in Jasiira, a few kilometres south of Mogadishu, where seawater is trapped and left to evaporate in the sun.
Today I’m going to do this common experiment that is used in chemistry classes called the elephant’s toothpaste. Elephant’s toothpaste is a foamy substance caused by the rapid decomposition of hydrogen peroxide. This is often used for classroom demonstrations because it requires only a small number of ingredients and makes a “volcano of foam”.
Things you’ll need: a plastic container (as shown on the picture), potassium iodide, food coloring, latex gloves, dishwasher soap, hydrogen peroxide 6%, and a graduated cylinder.
Place the graduated cylinder in the middle of the plastic container (it will be very messy so prepare some paper towels).
Wear the latex gloves and pour 50 ml of hydrogen peroxide into the graduated cylinder.
Pour food coloring and dishwasher soap into the graduated cylinder.
Put 2 grams of potassium iodide. The reaction will start.
This is a fun experiment. You could see the liquid just flows out nicely.
The reaction ended in about 30 seconds. Very fun for young kids.
Concentrated (>30%) hydrogen peroxide is first mixed with liquid soap. Then a catalyst, often potassium iodide or catalase from baker’s yeast, is added to make the hydrogen peroxide decompose very quickly. Hydrogen peroxide breaks down into oxygen and water. As a small amount of hydrogen peroxide generates a large volume of oxygen, the oxygen quickly pushes out of the container. The soapy water traps the oxygen, creating bubbles, and turns into foam. Often some food coloring is also added before the catalyst to spice up the experiment, and make it more colorful and fun.
This experiment shows the catalyzed decomposition of hydrogen peroxide. Hydrogen peroxide (H2O2) decomposes into water and oxygen gas, but normally the reaction is too slow to be easily perceived or measured:
The iodide ion from potassium iodide acts as a catalyst—it speeds up the reaction without being consumed in the reaction process. The reaction is exothermic; the foam produced is hot. A glowing splint can be used to show that the gas produced is oxygen.
As said on my post (it finally came 2) the silver nitrate is only 10 grams and it’s about $20. 10 grams is a little amount and it is very expensive, so I hope I don’t make any mistakes. The classic silver tree demonstration! Very simple to set up and perform, it’s great to introduce kids to the world of chemistry.
Things you’ll need: copper wire, silver nitrate, a beaker, and distilled water.
Pour 120 ml of distilled water into the beaker.
Pour about 4 grams of silver nitrate into the beaker.
Make a copper coil by wrapping copper wire around something round and taking it out. Put the copper coil into the beaker.
As you could see the reaction has started.
0 minutes
The more silver nitrate you add, the quicker the reaction starts.
15 minutes
Silver Crystals are covering the copper. It looks very pretty.
30 minutes
Prettiest experiment I ever performed.
50 minutes
This experiment is very easy to setup and very fun for kids.
1 hour
You can keep going, but the more you wait, the more crystals will grow and turn blacker because when silver nitrate absorbs light, it will turn black. Now the silver nitrate is turning into silver metal.
Now I’m going to filter the silver metal out and see what comes out.
I got the silver metal. I put it in a bottle to preserve it.
The silver nitrate is in solution and the metallic copper will dissolve to form copper nitrate; as it does so, the silver in solution will be precipitated out as metallic silver. That is, the silver in solution is exchanged for copper and the copper that is not in solution is substituted for silver. Hope this makes sense!
Today, I’m going to do a common experiment about the sediment of Lead (II) Nitrate. This is a very quick demonstration showing that two solids can react together. White lead nitrate and white potassium iodide react to make yellow lead iodide.
I added 5 grams of each chemical into 95ml of water so I could have 5 % of each.
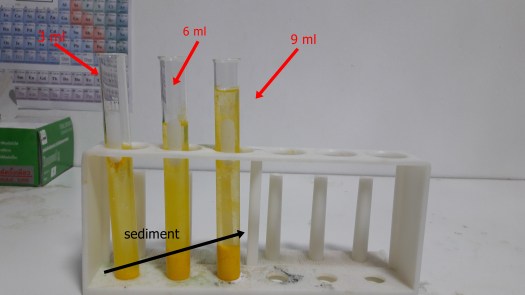
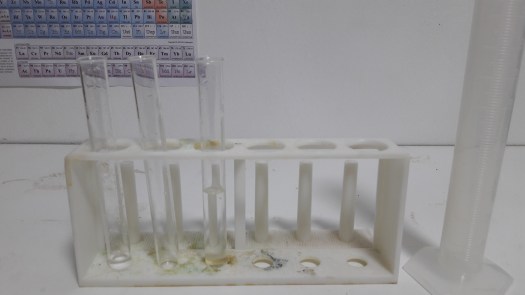
I pour 10ml of potassium iodide solution into each test tube. And poured 3ml of lead (II) nitrate into the first test tube. Poured 6ml of lead (II)nitrate into the second test tube. And poured 9ml of lead (II) nitrate into the third test tube.
As you could see on the picture the more lead (II) nitrate I add to the potassium iodide, more sediment increases in the test tube.
The demonstration might have more impact if the test tubes are opaque and the yellow product can be poured out and shown to the unsuspecting audience. Have a white background available.
Point out that for a reaction to occur, particles of the reactants must meet. This is much easier in solution (where the particles are free to move) than in the solid state.
The reaction is:
Pb(NO3)2(s) + 2KI(s) → 2KNO3(s) + PbI2(s)
All of these compounds are white except lead iodide, which is yellow.
Lead ethanoate can be substituted for lead nitrate, but the reaction is much slower.
The experiment Diffusion in liquids is a class practical using the same compounds but as solutions.
We must first convert from a word equation to a symbol equation:
Lead (II) Nitrate + Potassium Iodide → Lead (II) Iodide + Potassium Nitrate
The lead (II) ion is represented as Pb2+, whilst the nitrate ion is NO−3. To balance the charges, we require two nitrate ions per lead (II) ion, and so lead (II) nitrate is Pb(NO3)2 .
The potassium ion is K+ and the iodide ion is I−. The two charges balance in a 1:1ratio, so potassium iodide is simply KI.
In lead (II) iodide, the charges balance in a 1:2 ratio, so the formula is PbI2.
Finally, in potassium nitrate, the charges balance in another 1:1 ratio, giving a formula of KNO3 .
The symbol equation is as follows:
Pb(NO3)2+KI→PbI2+KNO3
The most obvious change we must make, when balancing this equation, is to increase the number of nitrate ions on the right hand side of the equation. We can do this by placing a coefficient of 2 before the potassium nitrate:
Pb(NO3)2+KI→PbI2+2KNO3
In doing this we have upset the balance of potassium ions on each side of the equation. Again, we can fix this: we must simply place another coefficient of 2, this time before the potassium iodide:
Pb(NO3)2+2KI→PbI2+2KNO3
Checking over the equations once more, you will notice that we initially had 1 iodide ion on the right hand side, but 2 on the left. However, we already dealt with this in balancing our potassium ions. Now, our equation is balanced.
And that’s it! One last thing to add is that you may have noticed the irregularity in iodide ions rather than nitrate ions. In this case, you would have arrived at the same answer simply by working backwards.
In this post, I’m going to show you how to change iron to copper in two easy steps.
That’s not rust
Things you’ll need: copper (II) sulfate, a cup, a spoon, water, and nails or paper clips.
Pour water into the cup.
Put lots of copper sulfate into the cup. I put two spoons.
Drop a paper clip or a nail into the solution.
Wait for 24 hours, and take the paper clip/nail out of the cup. Be careful not to leave it too long in the cup, or else the metal will rust. (Wait for one day after you take the metal out of the solution).
You can’t see the copper very well because of the shadow
In Discorso, one of the last manuscripts written by Antonio Neri before his death, he reveals several transmutation recipes. One describes turning iron into copper; it is instructive because it uses common materials that we can identify and because the chemistry is now well understood.
Take some iron sheets and lay them in vitriol water, being immersed in that, they will rust. Scrape off this rust, which will be a red powder, melt it in a crucible, and you will have perfect copper. The same effect can be had from various waters that are naturally vitriolated, because they flow through mines of vitriol, such as those of a source some distance from Leiden, and another below the fortress of Smolnik, [now in Slovakia].
Vitriol is an acidic sulfate dissolved in water, it could be made in the laboratory, but it also occurred naturally around mining operations where sulfurous minerals were present. Alchemists knew this solution as “oil of vitriol” and “spirit of vitriol.” The mine that Neri references in Smolnik became famous for transmutation. As late as the eighteenth century, scientists and experimenters from around Europe made the pilgrimage to see the effect for themselves and tried to figure out what was happening. It may be a surprise to some readers, but following the above instructions will, in fact, produce copper just as Neri claimed. There is no deception or sleight of hand involved; the explanation is straightforward, but first, Neri treats us to a rare glimpse of his own reasoning on the subject:
Some estimate and not without reason, that this experiment, being used to prove the transmutation of metals, is not suitable for this purpose. They say that the vitriolated waters become such because they are already heavy with the corrosive spirits of sulfur, having passed through the copper or iron mine, these waters corrode copper in the same way aqua fortis corrodes silver. So that really the substance of the copper remains in the water, which attacks the surface of the iron, which always remains iron. However, if that were true then the iron would not get consumed, or if it were consumed it would mix with the substance of the corroded copper in the water, and if it were fused, it would remain a mixture of iron and copper. And yet in this experiment, all the iron is consumed; it is reduced by the vitriolated water into powder, […] which in the fusion is still pure copper, so there should remain no doubt that this is a true transmutation.
Given the state of chemistry at the time, Neri’s reasoning is clear and rational. The iron disappears and a copper coating materializes in its place. What better evidence of transmutation could one ask for?
The key to what was actually happening is in the criticism leveled by skeptics. It turns out that they were on the right track, but neither they nor Neri had the full picture. Today, we understand it as a simple ion exchange reaction; blue vitriol water is a transparent saturated solution of copper sulfate (CuSO4), in the presence of solid iron, the liquid dissolves the iron; copper from the vitriol is deposited in its place. The two metals, copper and iron, change places: the iron dissolves, forming green vitriol (FeSO4) and copper is expelled from the solution. The result is a reduction in the amount of the iron, which is replaced by a proportional deposit of pure copper.
On a physical level, this chemical reaction is no different today than it was in the seventeenth century. What has changed is our interpretation of the experiment. What Neri viewed as a transformation of iron into copper, we now see as an exchange. There is, however, a deeper lesson in all this. As an alchemist, Antonio Neri was not being delusional or dishonest; he was careful, observant and applied his knowledge as best he could. This is no different from the way science works today. Both then and now, to be successful in unraveling nature’s secrets, one must become accustomed to a very uncomfortable situation: In the past, careful reasoning by brilliant thinkers has led to utterly wrong conclusions. The fact that much of our world is a mystery is unsettling; that the very process we use to understand it can be so flawed is harder to accept. Even more difficult is that the faculty we all rely on for survival—our own wits—can lead us so far astray.
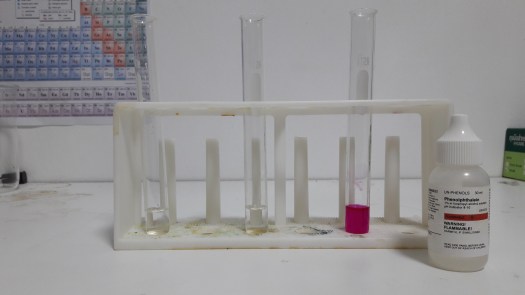
Change a clear liquid pink, then back to clear again in this impressive experiment. It may seem like magic, but it’s actually the science of PH.
Things you’ll need: a beaker, a graduated cylinder, test tube holder, 3 test tubes, pipet, phenolphthalein, sodium carbonate, vinegar, and water.
Fill the beaker halfway with water, and set the test tubes in the holder. I’ll refer to them in order as test tube 1, 2, and 3.
Use a spoon to put a little bit of sodium carbonate in test tube 1.Use the pipet to add a few drops of water from the beaker. Swirl the test tube around to dissolve.
In test tube 2, put two drops of phenolphthalein.
Use the graduated cylinder to add 10 ml of vinegar to test tube 3.
Carefully fill the first two test tubes with water from the beaker. Then, all at once, pour the contents of test tube 1 and 2 back into the beaker. The water will turn pink.
Now pour the contents of test tube 3 into the beaker. the liquid will now be clear again.
Phenolphthalein is a PH indicator that changes color when mixed with a base (like sodium carbonate) but stays clear when mixed with an acid (like vinegar). In step 5, the phenolphthalein reacted to the basic sodium carbonate and turned the solution pink. To change it back to clear, you added acidic vinegar, neutralizing the basic sodium carbonate.
Learn more about phenolphthalein at this post: Invisible ink
Let’s start off with an easy experiment today. Create a colorful column with three liquids stacked on top of each other inside a test tube.
Things you’ll need: test tubes, pipet, food coloring, light or dark corn syrup, vegetable oil, and water.
Pour about 3 ml of corn syrup into the test tube.
Use a pipet to add 3 ml of water with food coloring (I use green). Make sure to drop the water on the side of the test tube.
Do the same thing with vegetable oil but no water and food coloring.
Observe the column you made. Which liquid is the least dense? Which is most dense? You could say that the liquid on the bottom has higher density. It means that the corn syrup has a high density. Medium density is water. And the vegetable oil has low density.
My density column.
What will happen if you add other liquids? Try adding apple juice, vinegar, soda, etc. You could also follow the column on the bottom.
An object’s density is determined by comparing its mass to its volume. Consider a rock and a cork that are the same sizes; the rock is denser than the cork, because it has more mass in the same volume. This is due to the atomic structure of the elements, molecules, and componds that make it up. The same is true for liquids. Although you added approximately the same volume of each liquid, they all had different densities, based on mass per volume. Water has a density of about 1.0 gram per ml of volume. Matter with higher density will sink in water; matter with lower density will float on top. Calculate the approximate density of other liquids using this formula: Density= Mass/Volume. Measure mass by calculating weight (how heavy it is). Weigh each liquid in grams (subtracting the weight of your container), the divide that number by the liquid’s volume (ml). The answer is density in grams per milliliter.
Well, you’re probably not interested in this post because you could just search the internet and find the same steps of this experiment. But the only thing good about this is that I will explain the science of this experiment. So let’s get started.
Things you’ll need: a flask, a beaker, Alka-Seltzer tablets (I used this on the Cold Chemistry experiment), food coloring, vegetable oil, and water.
Fill the flask to the 200 ml line with vegetable oil.
In a beaker, stir several drops of food coloring into 100 ml water. Fill the rest of the flask with the colored water from the beaker, adding about 50 ml. The water will slowly sink to the bottom of the flask.
Break an Alka-Seltzer tablet into a few small pieces and drop them in the flask one at a time.
Watch your lava lamp erupt into activity! As the reaction slows down, you could add more Alka-Seltzer pieces.
Oil and water have different densities. Oil is a non-polar liquid while water is a polar one. Polarity refers to the way molecules connect with each other – what kinds of molecular bonds they have. Polar molecules only bond with other polar molecules. This is why oil doesn’t mix with water. Real lava lamps use a polar and non-polar liquid just like this one did. However, the densities of liquids are much closer together than oil and water. The denser liquid sinks to the bottom, but the lava lamp light heats it up until it expands and becomes less dense, causing it to rise. As it gets farther from the light, it cools down, sinks, and starts over.
Instead of using a light, in my homemade lava lamp I used Alka-Seltzer, which reacts with the water to produce carbon dioxide gas bubbles. These stick to the water droplets. The water/gas combo is less dense than the oil, so it rises to the top of the flask. At the top, the gas bubbles pop and escape into the air, allowing the dense water to sink back to the bottom again. When enough carbon dioxide gas escaped, the reaction slowed. Add more Alka-Seltzer tablets to keep the reaction going.
Endothermic chemical reaction use up heat energy, which means the end result is cool to the touch. Use Alka-Seltzer to see this reaction for yourself!
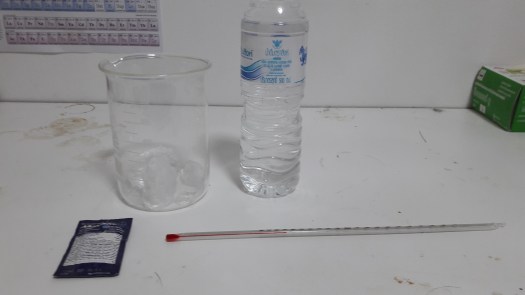
Things you’ll need: A beaker, a thermometer, an Alka-Seltzer tablet, ice, and water.
Fill the beaker with ice. Add enough water to cover the ice fully.
Put the thermometer in the beaker and read the temperature of the ice water after about one minute when the temperature is steady. Mine is 11°C (51°F).
Add the Alka-Seltzer tablet to the beaker and read the thermometer. Mine is 6°C (42°F)
Melting ice absorbs heat and cools water until the ice water reaches the freezing point (0°C=32°F). Mixing Alka-Seltzer with the cold water was an endothermic reaction, meaning it used heat. An Alka-Seltzer tablet contains two main ingredients: sodium bicarbonate and citric acid. In the ice water, they reacted to form sodium citrate and carbon dioxide, which removed energy and further dropped the solution temperature. The Alka-Seltzer solution became super-cooled by the endothermic reaction.
How to make Slime in Three Steps (and states of matter)
I’ll show you how to make slime in the easiest way. It’s going to be messy but it’s worth to try.
Things you’ll need: Borax, water, a spoon, school glue, and two cups.
Add one teaspoon of borax to 75ml of water into the cup and stir until all of the borax is dissolved. Add a few drops of food coloring if you like.
Pour one teaspoon of water and one teaspoon of school glue. Use the spoon to mix the water and glue.
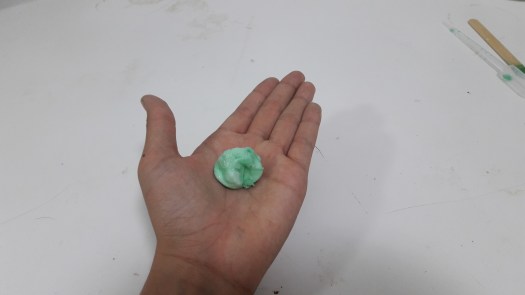
Add about 30 drops of the solution from step 1. and stir. If necessary, add a few more drops of the solution and stir until all of the glue and water is thick and not sticky.
Your slime is very similar to “Silly Putty” or “GAK”. Silly Putty was accidently created 50 years ago by an engineer trying to develop a synthetic rubber from silicone oil and boric acid (a chemical relative to borax).
When you added the borax solution to the glue mixture, you could see how they came together to form a glob. The borax solution links or bonds parts of the glue together into tiny structures that are atomic or molecular nets that can trap and hold water.
A solid, such as ice, is rigid or stiff and has a definite shape and volume. The parts are held together, and cannot move past one another. But, if ice is melted, it forms liquid water. A liquid has a definite amount of space or volume, but its parts can move easily and a liquid will flow and take the shape of its container.
The slime is a substance between a solid and a liquid like clay. They call that oobleck. If you pull the slime apart very quickly, it will break like a stick which is a solid. But you can put the slime back together again because the parts can flow like a liquid.
To learn more about slimes and gels go and buy this kit at Amazon.com.
We know that phenolphthalein will turn pink if you drip 2-3 drops into a chemical that is base. That gave me an idea of how to make invisible ink.
Things you’ll need: phenolphthalein solution, white paper, Q-tip, and ammonia-based glass cleaner (like Windex)
Put a few drops of phenolphthalein onto a Q-tip. Use the Q-tip as your pen to write a simple message (like “hello”).
Let the paper dry. You cannot see the message.
Once the paper is dry, spray it with a few squirts of glass cleaner. The message will appear again in purple.
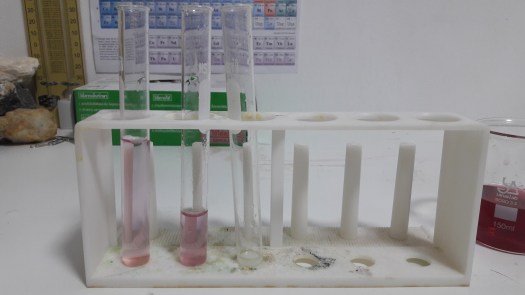
Phenolphthalein is a PH indicator that is pink in the presence of bases. Since the window cleaner is a base, it reacted with your phenolphthalein writing to change color and appear visible. Look at this picture below.
In the first test tube is vinegar. In the second test tube is water. In the last test tube is borax. Each test tube has 2 drops of phenolphthalein.
Xylitol is a sugar alcohol used as a sweetener. It has the formula CH2OH(CHOH)3CH2OH. Xylitol is categorized as polyalcohol or sugar alcohol, and it has some dental benefits in that it reduces cavities. One gram of xylitol contains 2.43 kilocalories (kcal), as compared to one gram of sugar, which has 3.87 kcal. Xylitol has virtually no aftertaste. Xylitol’s lower effect on blood sugar is a function of its glycemic index(GI); xylitol’s GI is 7, compared 100 for glucose. Xylitol contains zero fructose and has negligible effects on blood sugar and insulin. Therefore, none of the harmful effects of sugar (like diabetes) apply to xylitol. Xylitol has no known toxicity in humans, however, some report heart palpitations after consuming it. In one study, participants consumed a monthly average of 1.5 kg of xylitol with a maximum daily intake of 430 g with no apparent ill effects. Like most sugar alcohols, xylitol has a laxative effect because sugar alcohols are not fully broken down during digestion; however, the effect varies from person to person. In one study of 13 children, four experienced diarrhea from xylitol’s laxative effect when they ate more than 65 grams per day. Studies have reported that adaptation occurs after several weeks of consumption. Again, Xylitol has some dental benefits in that it reduces cavities. Bacteria feed on glucose from food, but they can not use xylitol. Replacing sugar with xylitol, therefore, reduces the available fuel for the harmful bacteria.But the effects of xylitol go beyond that. Even though the bad bacteria can not use xylitol for fuel, they still ingest it. When the bacteria are full of xylitol, they are unable to take up glucose, so essentially their energy producing pathway is “clogged” and they end up dying. In other words, when you chew gum with xylitol (or use it as a sweetener), the sugar metabolism in the bacteria is blocked and they literally starve to death. In one study, using xylitol-sweetened chewing gum reduced levels of the bad bacteria by 27-75%, while it had no effect on the friendly bacteria. Xylitol could also starve (kill) the bacteria in ear infections which occurs often to children. This could decrease the infection rate by 40%. However, Xylitol is very toxic to dogs. When dogs eat xylitol, their bodies mistakenly think that they’ve ingested glucose and start producing large amounts of insulin. When this happen, the dog’s cells start taking up glucose from the bloodstream. This can lead to hypoglycemia (low blood sugar levels) and be fatal. Xylitol may also have detrimental effects on liver function in dogs, with high doses causing liver failure. But even when your dog only eats 0.1 grams of Xylitol, your dog could still get sick. Again, Xylitol chewing gum can prevent tooth decay.Learn more about Xylitol at https://en.wikipedia.org/wiki/Xylitol
Can you make colors move in milk? Then perform this experiment.
Things you’ll need: whole milk, a shallow dish, food coloring, and liquid dish soap.
1. Pour whole milk into the shallow dish.2. Let the milk warm up to room temperature.
3. Place drops of different food coloring in the milk. DO NOT STIR.
4. Place 1-3 drops of liquid dish soap in the middle of the dish. Enjoy the show!
3 seconds after 2 drops of liquid dish soap
5 seconds after 2 drops of liquid dish soap
The colors move as the soap spreads across the surface of the milk. Once soap covers the surface, the swirling will stop instantly (if you use water).
In whole milk, fat is the secret ingredient that keeps the colors move. As the soap spreads out, it sticks to tiny globules of fat. As the globules take up soap, they make more room for soap to spread out.


 Xylitol has no known toxicity in humans, however, some report heart palpitations after consuming it. In one study, participants consumed a monthly average of 1.5 kg of xylitol with a maximum daily intake of 430 g with no apparent ill effects. Like most sugar alcohols, xylitol has a laxative effect because sugar alcohols are not fully broken down during digestion; however, the effect varies from person to person. In one study of 13 children, four experienced diarrhea from xylitol’s laxative effect when they ate more than 65 grams per day. Studies have reported that adaptation occurs after several weeks of consumption.
  Again, Xylitol has some dental benefits in that it reduces cavities. Bacteria feed on glucose from food, but they can not use xylitol. Replacing sugar with xylitol, therefore, reduces the available fuel for the harmful bacteria.But the effects of xylitol go beyond that. Even though the bad bacteria can not use xylitol for fuel, they still ingest it. When the bacteria are full of xylitol, they are unable to take up glucose, so essentially their energy producing pathway is “clogged” and they end up dying. In other words, when you chew gum with xylitol (or use it as a sweetener), the sugar metabolism in the bacteria is blocked and they literally starve to death. In one study, using xylitol-sweetened chewing gum reduced levels of the bad bacteria by 27-75%, while it had no effect on the friendly bacteria. Xylitol could also starve (kill) the bacteria in ear infections which occurs often to children. This could decrease the infection rate by 40%. However, Xylitol is very toxic to dogs. When dogs eat xylitol, their bodies mistakenly think that they’ve ingested glucose and start producing large amounts of insulin. When this happen, the dog’s cells start taking up glucose from the bloodstream. This can lead to hypoglycemia (low blood sugar levels) and be fatal. Xylitol may also have detrimental effects on liver function in dogs, with high doses causing liver failure. But even when your dog only eats 0.1 grams of Xylitol, your dog could still get sick. Again, Xylitol chewing gum can prevent tooth decay.
 Learn more about Xylitol at
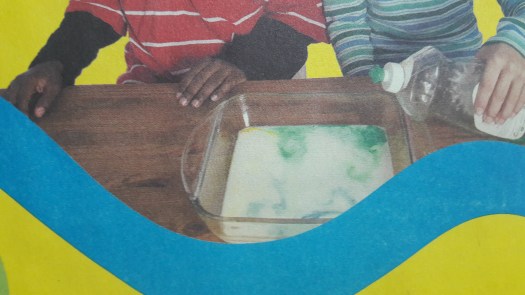
 2. Let the milk warm up to room temperature.